How to Build a House Kit: Assembling Your Kit
Prefabrication has revolutionized homebuilding, gaining popularity in the past decade. In the early twentieth century, Sears captivated the American market with mail-order kit homes delivered by railroad.
Fast forward to today, and the landscape of prefab homes has transformed dramatically. Whether you're considering going the kit route or your kit is in production, modern structural insulated panel (SIP) house kits from MSH exemplify this evolution.
They offer unmatched strength, ease of assembly, and exceptional energy efficiency, which can significantly save heating and cooling costs.
Many of our customers do most or some of the assembly and finishing. We’ll start with a list of the necessary skills and then move into details with photos. Following the article about assembling the walls and adding the roof, the building series moves into other topics like installing windows, doors, roofing, HVAC, etc.
Assess Your DIY Skills
Assembling a SIP home requires a range of skills, but motivated DIY enthusiasts can tackle many tasks. You'll also need some power tools, as well as other tools like hammers, levels, etc.
Key Skills Needed
Basic Carpentry
Understanding of measuring, cutting, and joining materials.
Ability to use hand and power tools such as saws, drills, and hammers.
Safety Practices
Familiarity with construction safety protocols, including the use of personal protective equipment (PPE).
Structural Assembly
Knowledge of properly aligning and connecting panels to form walls, floors, and roofs.
Understanding of load-bearing principles and structural integrity.
Insulation and Sealing
Techniques for ensuring airtight and watertight seals between panels. No other insulation is needed.
Proper installation of vapor barriers and other insulating materials.
Electrical and Plumbing Basics
Basic understanding of where and how to run electrical wiring and plumbing through the panels.
Ability to coordinate with or oversee professional electricians and plumbers for more complex installations.
Reading Building Plans
Ability to read and interpret architectural plans and assembly instructions.
Tasks You Can Do Yourself
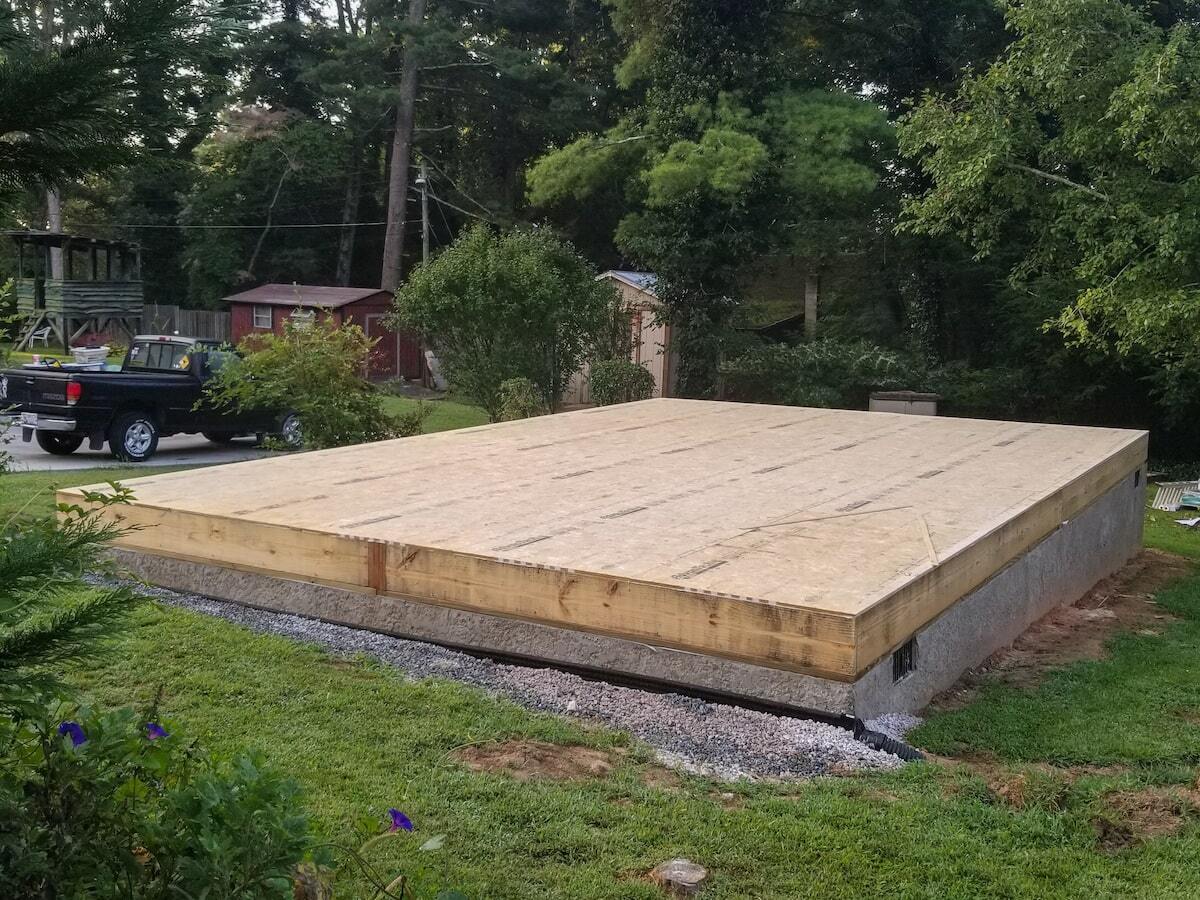
- Foundation Preparation: Depending on the type of foundation, you can prepare the site and pour concrete with some guidance.
- Panel Assembly: With the right tools and instructions, assembling the SIP panels can be manageable.
- Interior Finishing: Tasks like painting, installing flooring, and adding trim are often well within the reach of DIY builders.
Tasks That Might Require Professional Help
- Electrical and Plumbing Installation: While you can do some preliminary work, hiring licensed professionals ensures that everything meets code and is safely installed.
- HVAC System Installation: Installing heating, ventilation, and air conditioning systems often requires professional expertise.
- Structural Inspections: Ensuring the home's structural integrity might require periodic inspections by a certified professional.
Tips for DIY Assembly
- Follow Manufacturer Instructions: Adhere strictly to the assembly instructions provided by the kit manufacturer.
- Get Proper Training: Some SIP kit manufacturers offer training sessions or online resources to help you get started.
- Work with a Team: Assembling a SIP home is easier and safer with the help of friends or hired assistants.
- Plan for the Weather: Ensure you have good weather conditions, especially working on the exterior.
With the right skills and preparation, you can handle much of the assembly process for a SIP home. However, be prepared to hire professionals for specific specialized tasks to ensure your home is safe, up to code, and efficiently built.
Don’t forget the pizza.
Steps for Assembling a Kit
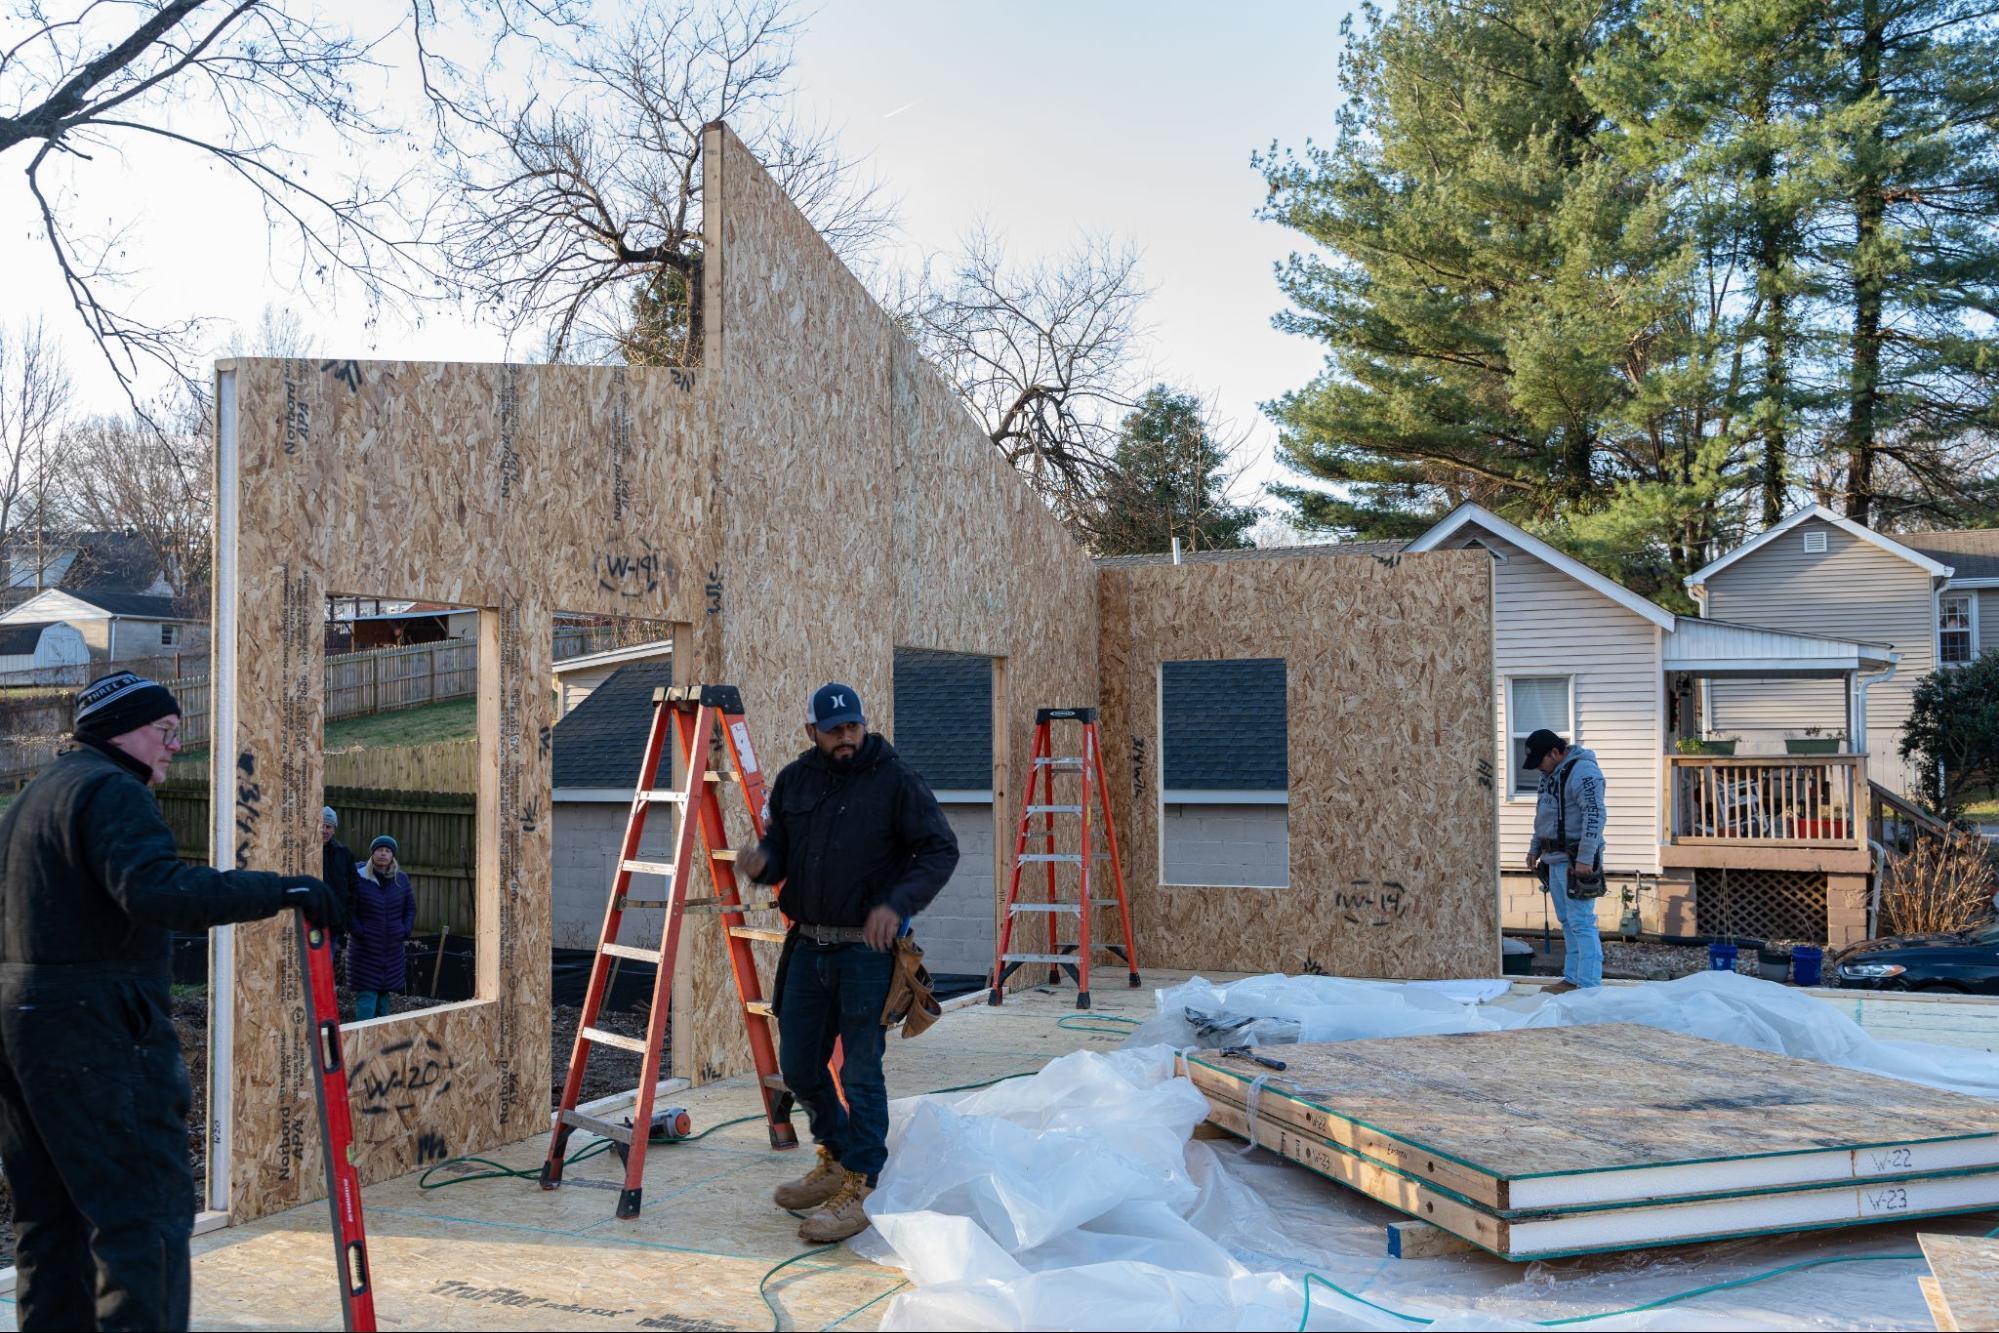
Whether you are a do-it-yourselfer or are having a contractor assemble your home, these steps and photos can help you perform or supervise the construction.
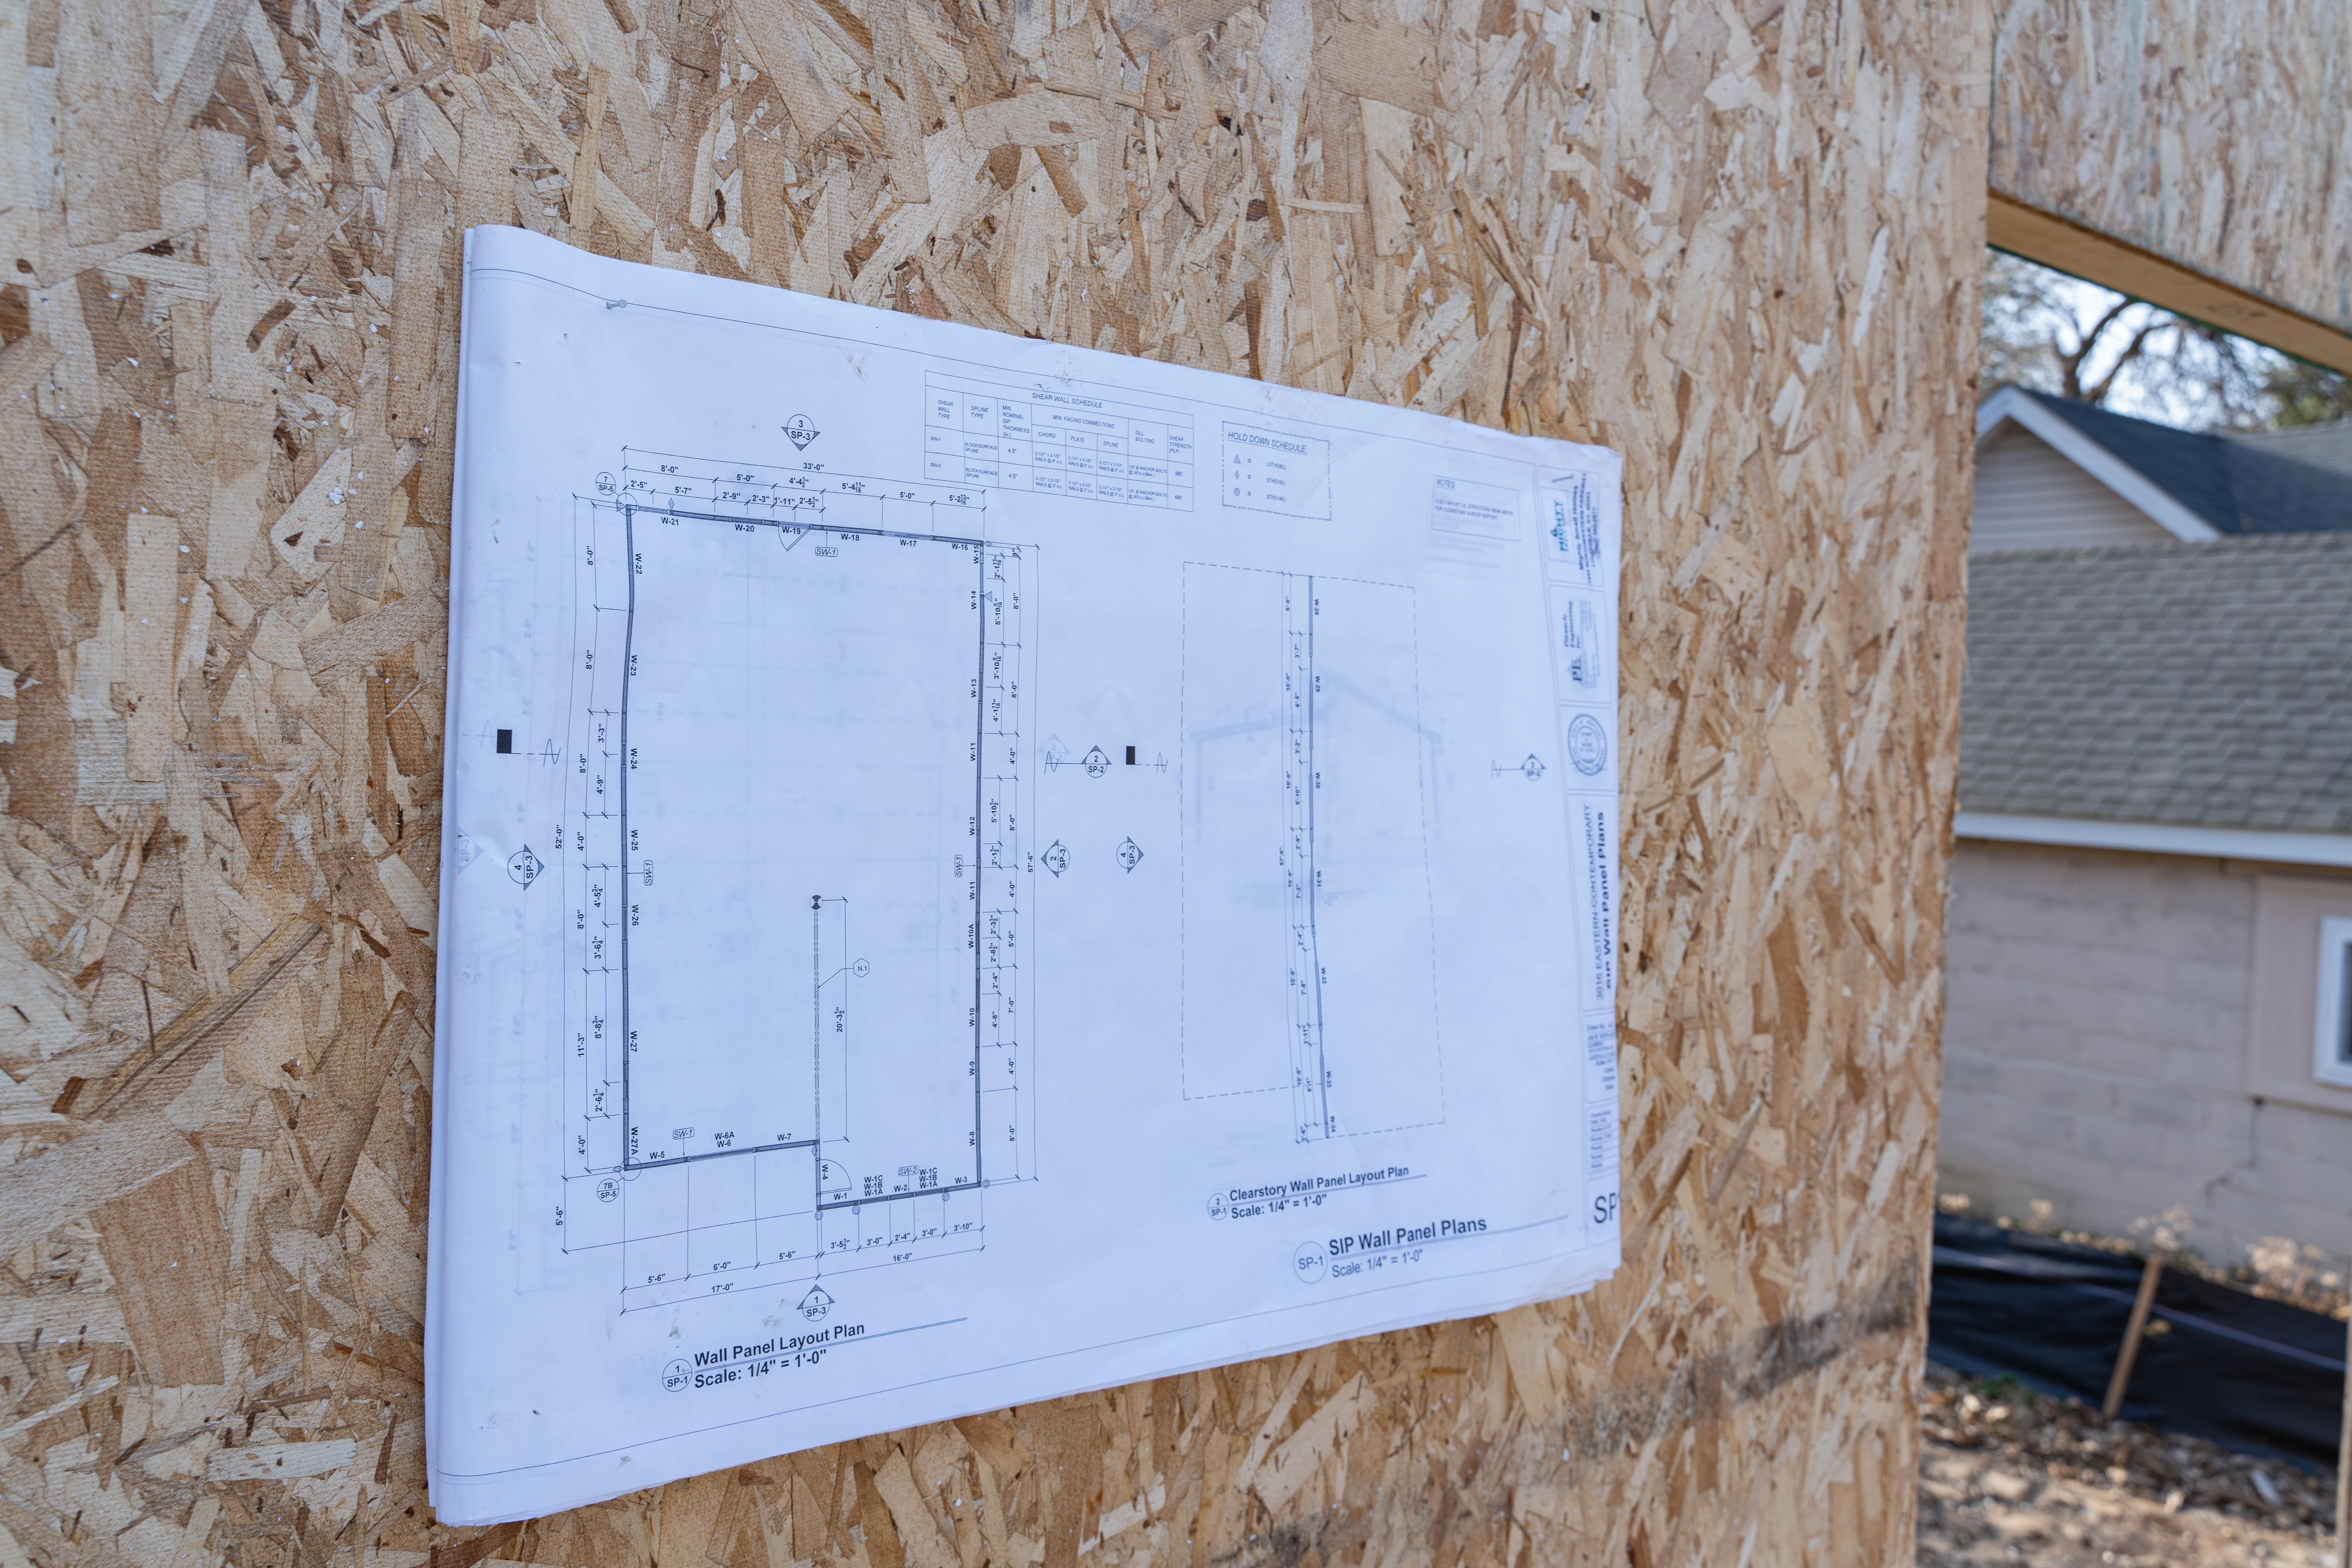
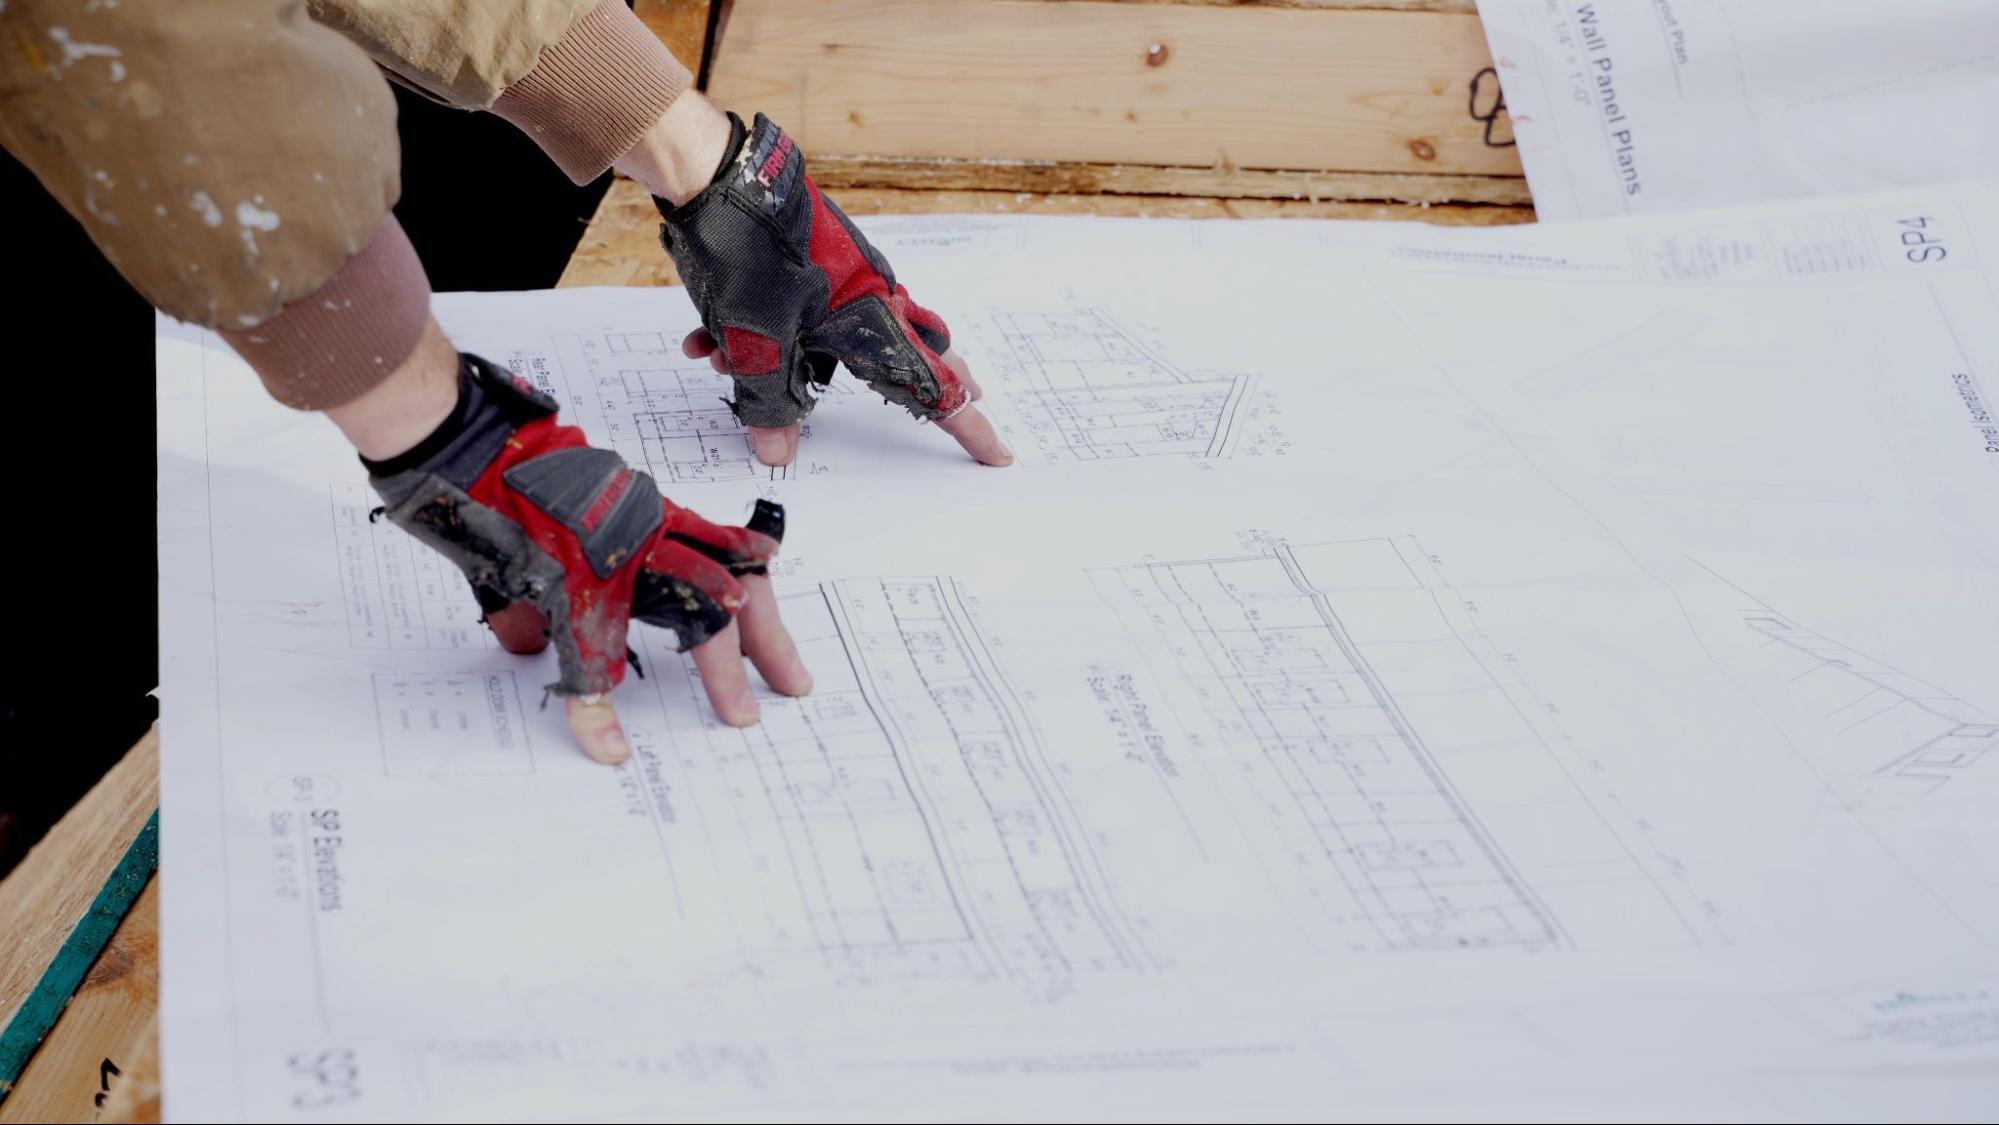
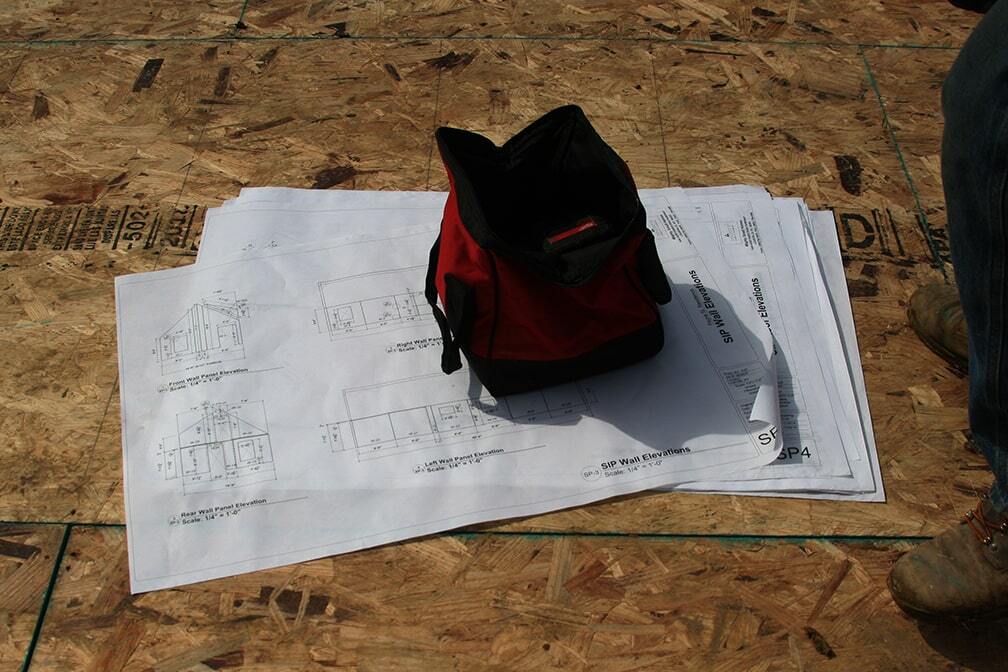
Step 1: Review your Building Plans
As the age-old saying goes, “Plan your work, and then work your plan.” And another, “Measure twice and cut once.”
You can review the CAD plans while you are awaiting delivery to familiarize yourself with the project details and identify any potential questions or concerns. This will help ensure a smooth and efficient build once your kit arrives.
Make sure you have oriented yourself well with the plan. Confirm that all your doubts (if any) have been clarified beforehand.
Be sure the plans you are working from are the same dimensions as the slab, crawl space, basement, floor deck, or trailer.
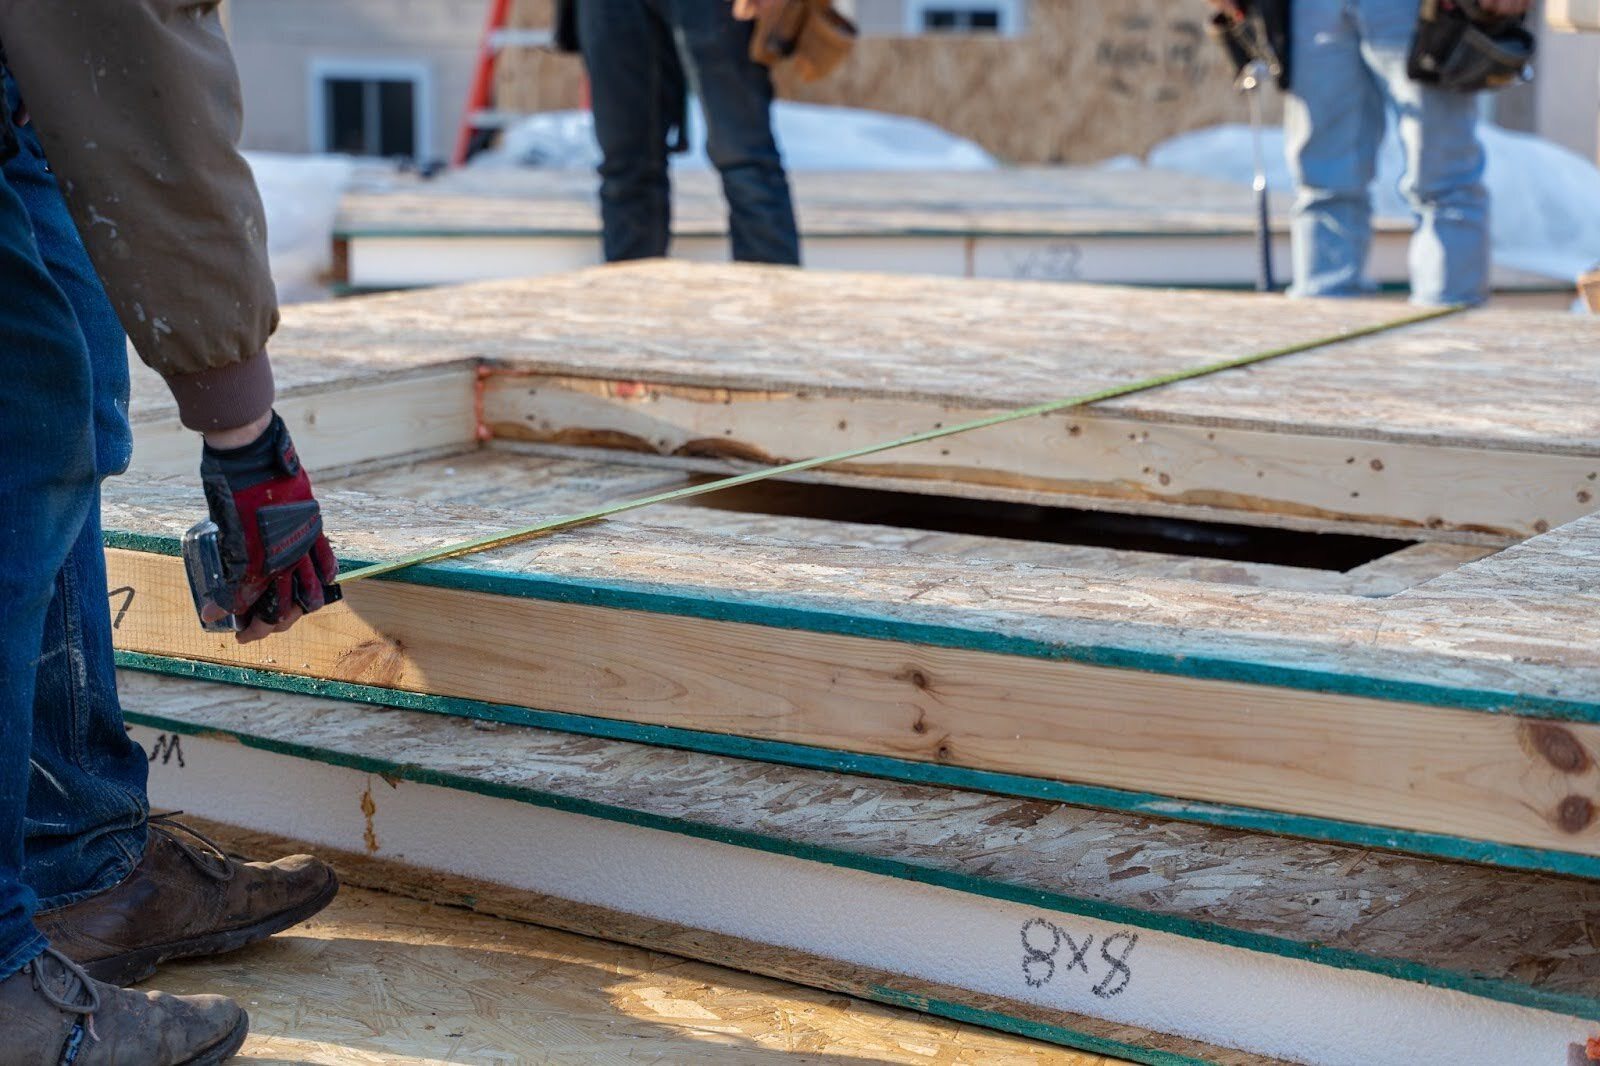
Make sure all panels match the dimensions shown on your plans. If not, you may have to trim a panel down. This is easy to do, but knowing ahead of time whether it’s necessary is key to an efficient building process.
If you have any questions or concerns during this phase, please call your Mighty Small Homes representative to discuss your doubts.
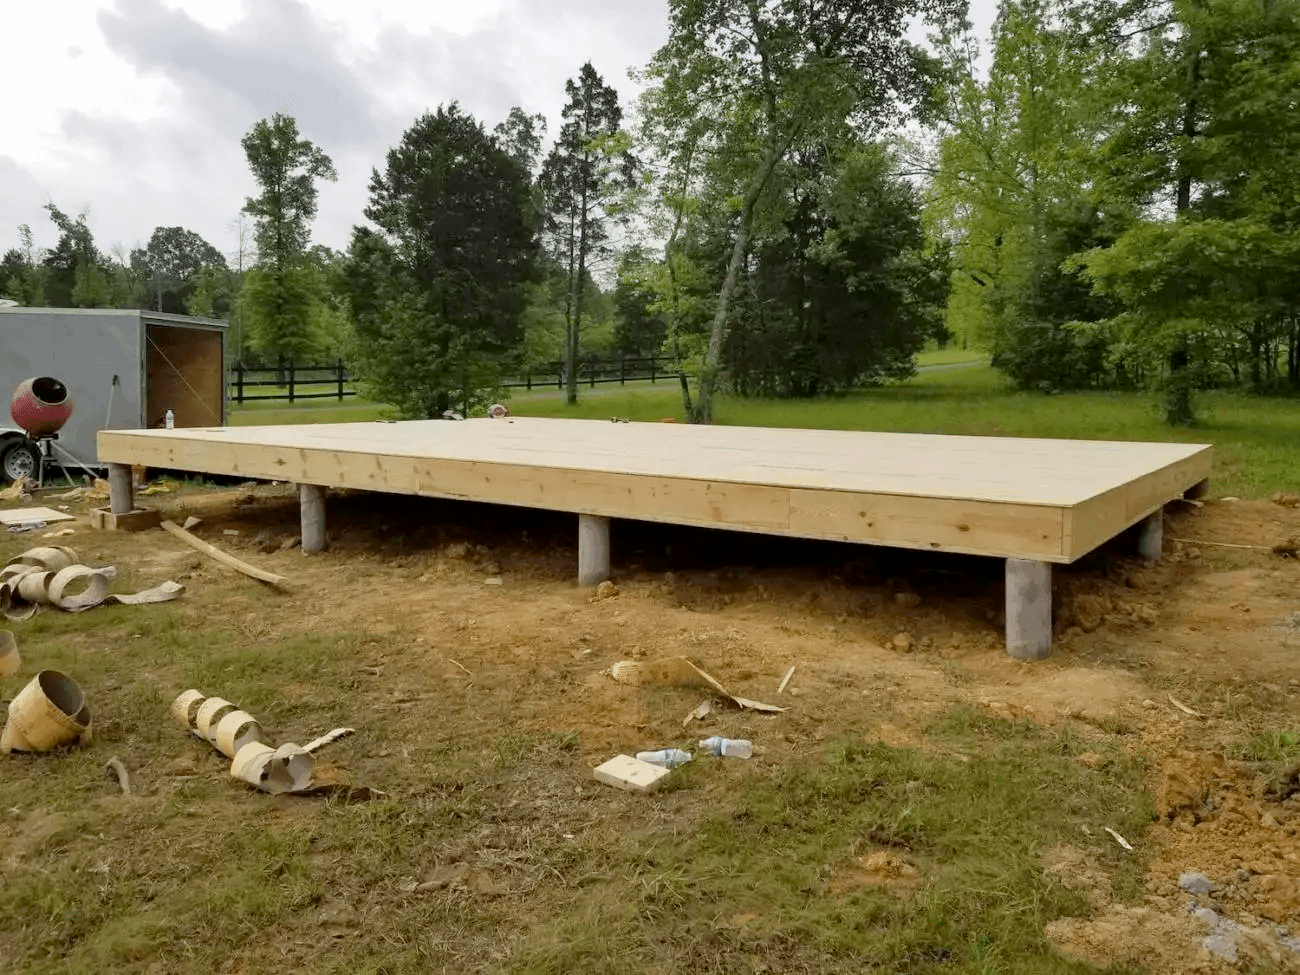
Step 2: Install the Bottom Plate to the Foundation
Glue and bolt the treated plate to the foundation. You can also nail the plate into the concrete with the proper tools. Otherwise, the anchor bolts should come up through the plate. A washer and tighten the nut to secure the plate.
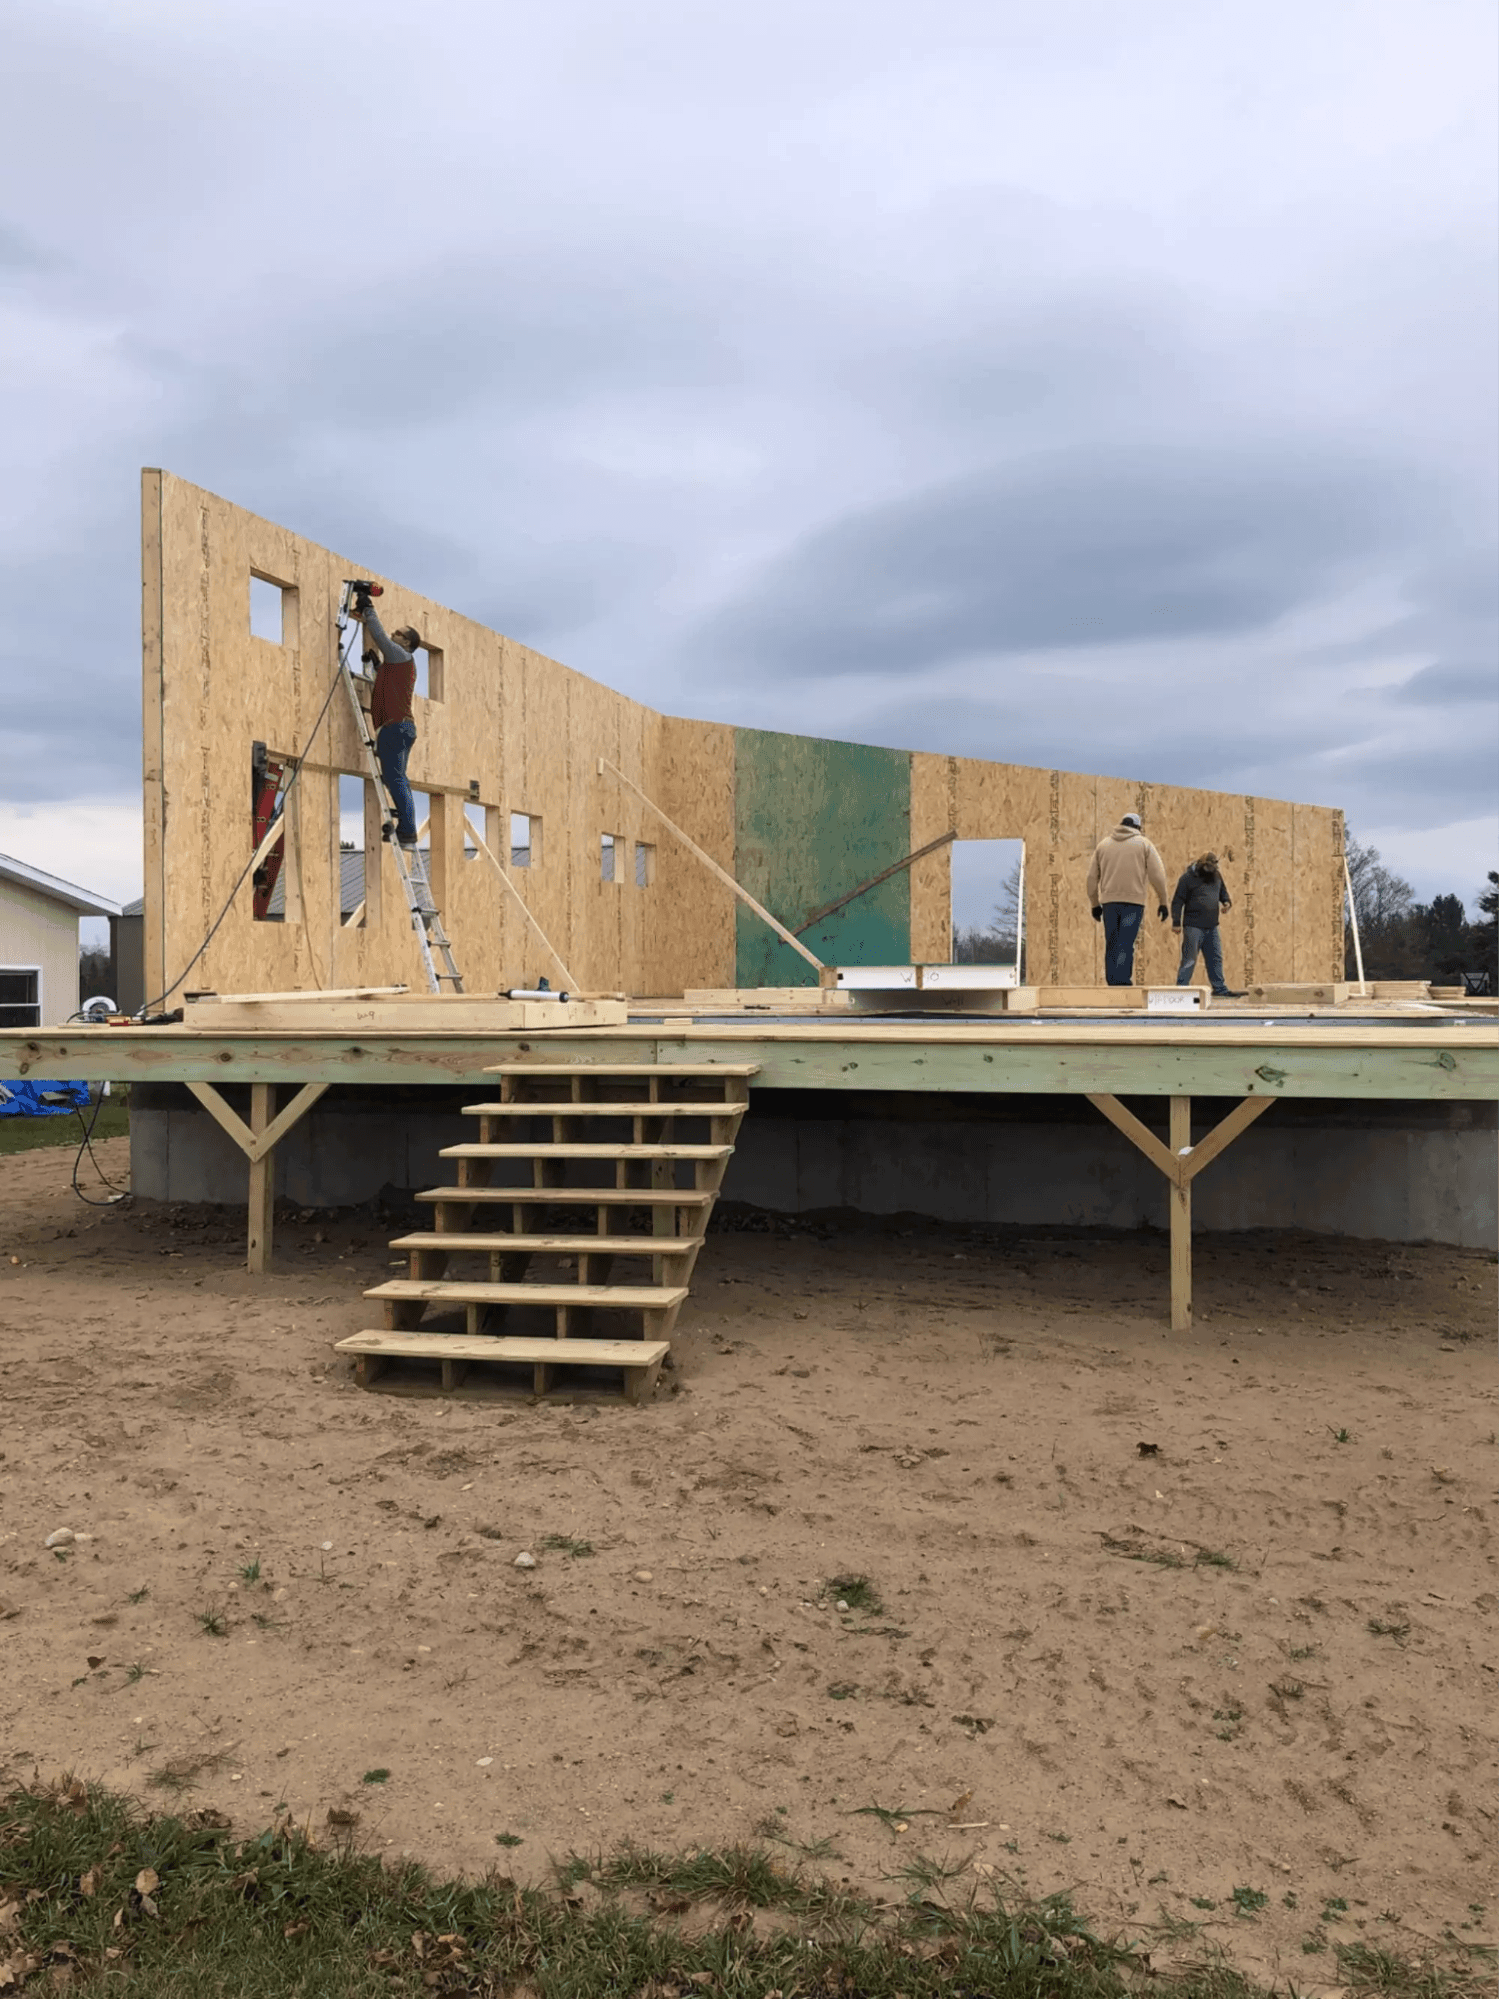
Step 3: Install First Two Corner Panels
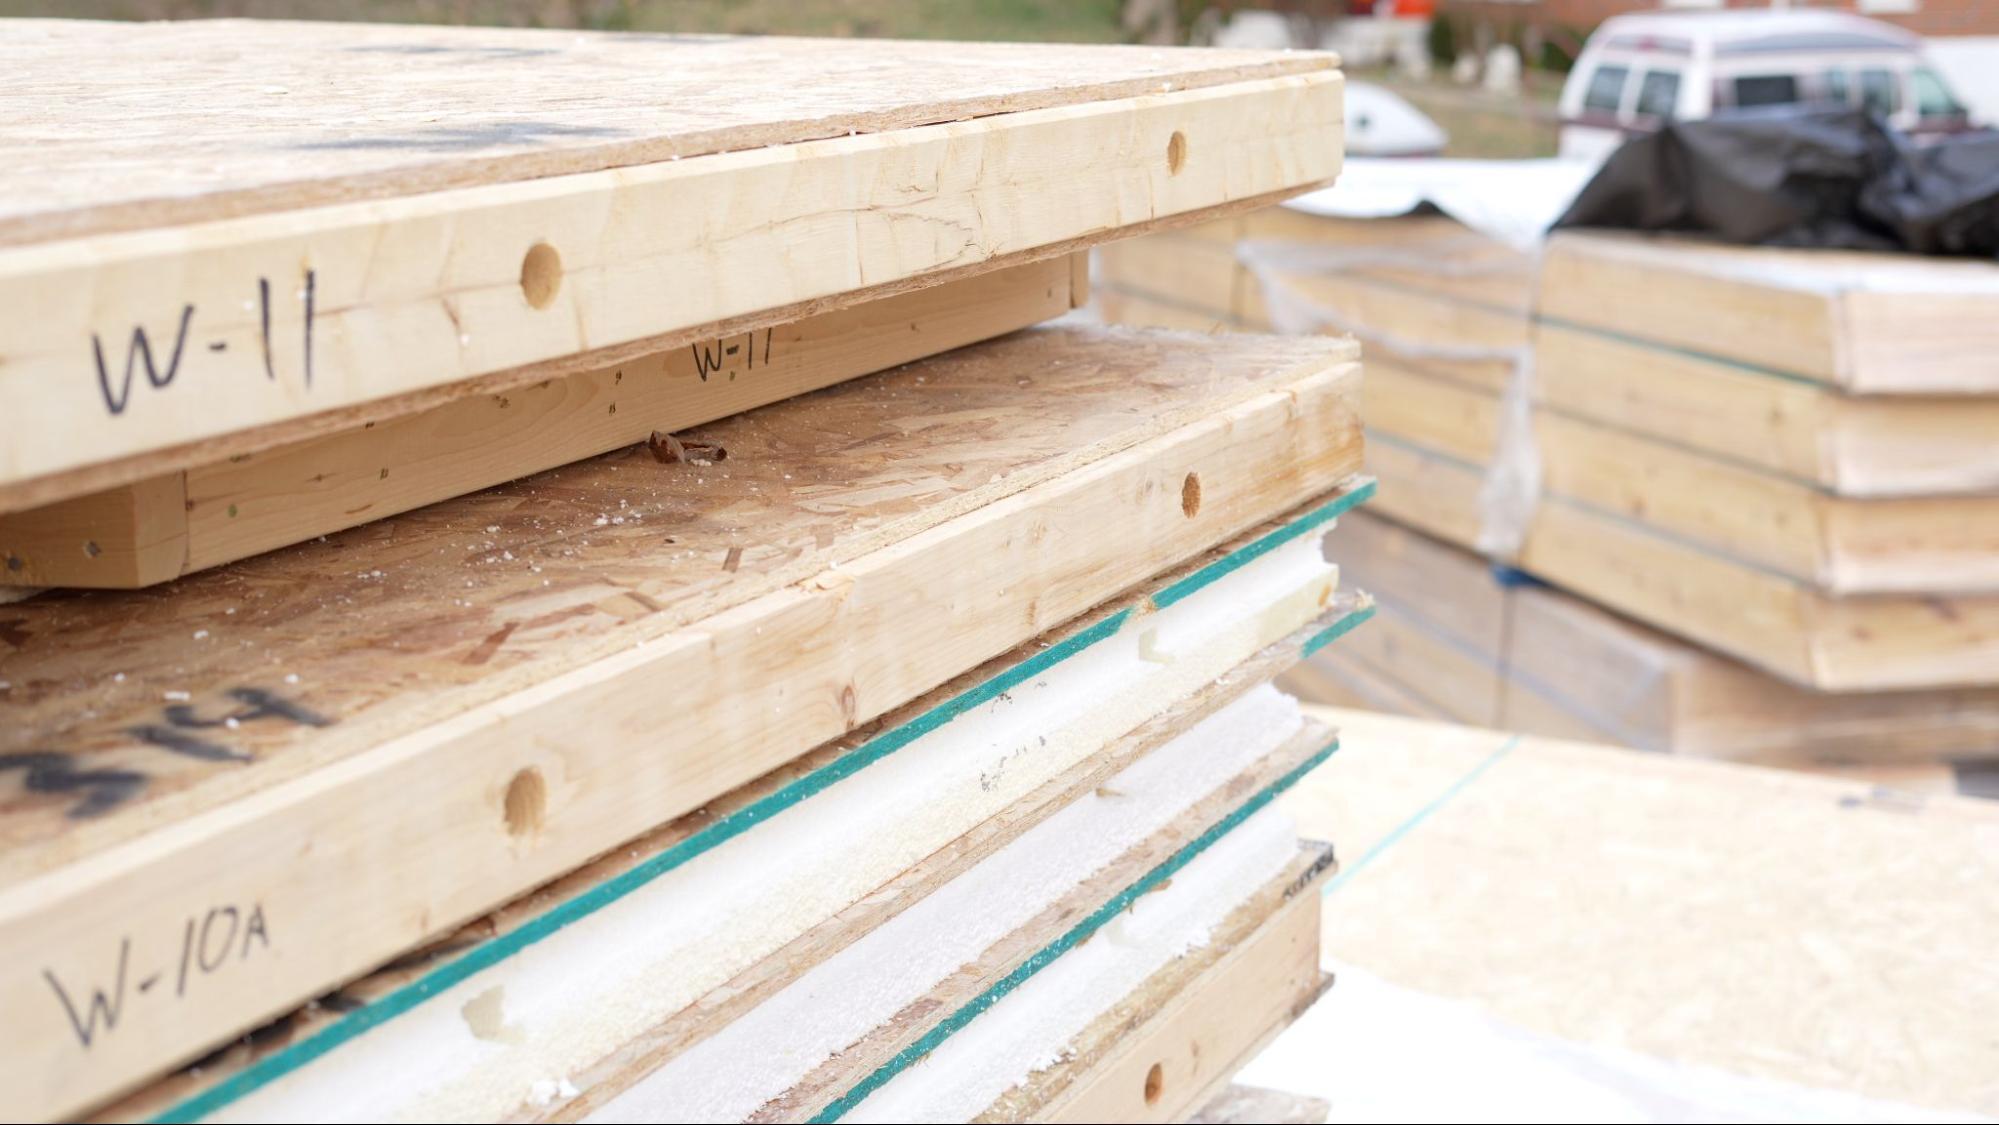
Consult the plans and locate the panel numbers you need to install your first two panels. Begin with corners opposite from where panels are stacked on the worksite.
Choose two corner panels to begin. We recommend starting with the panels on the far side, opposite the unloading area, and working your way back towards it. This approach minimizes the need to maneuver around panels that are already in place.
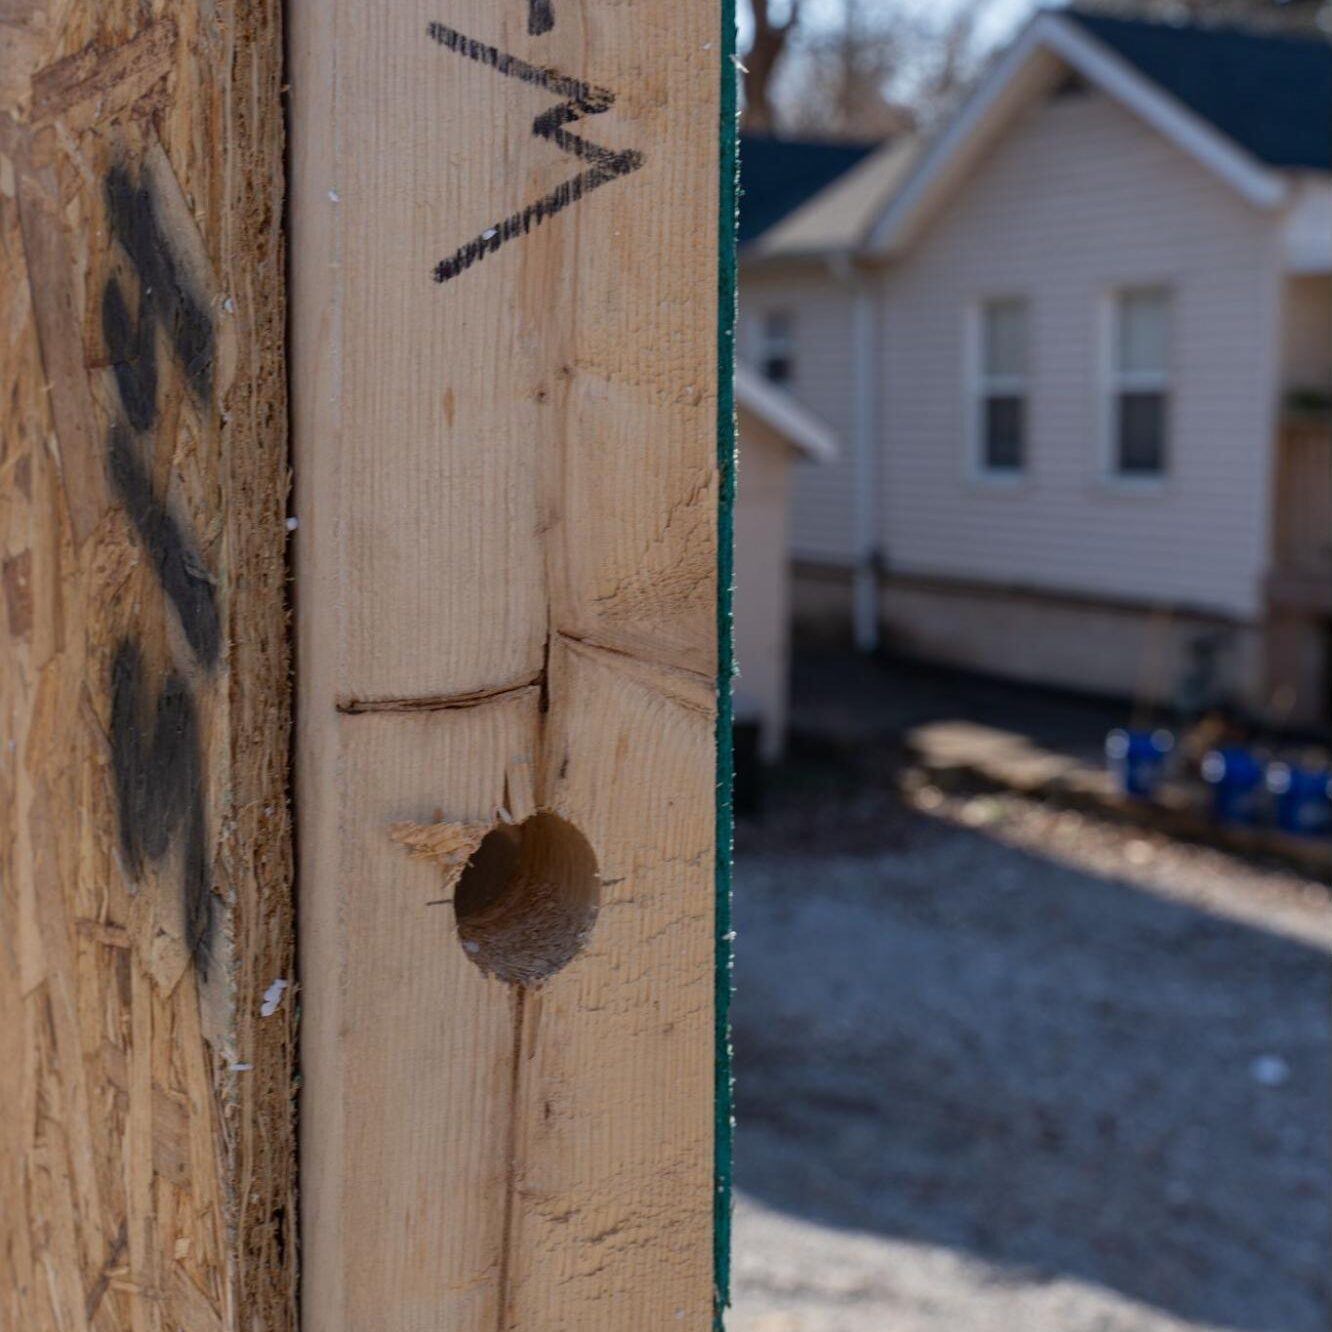
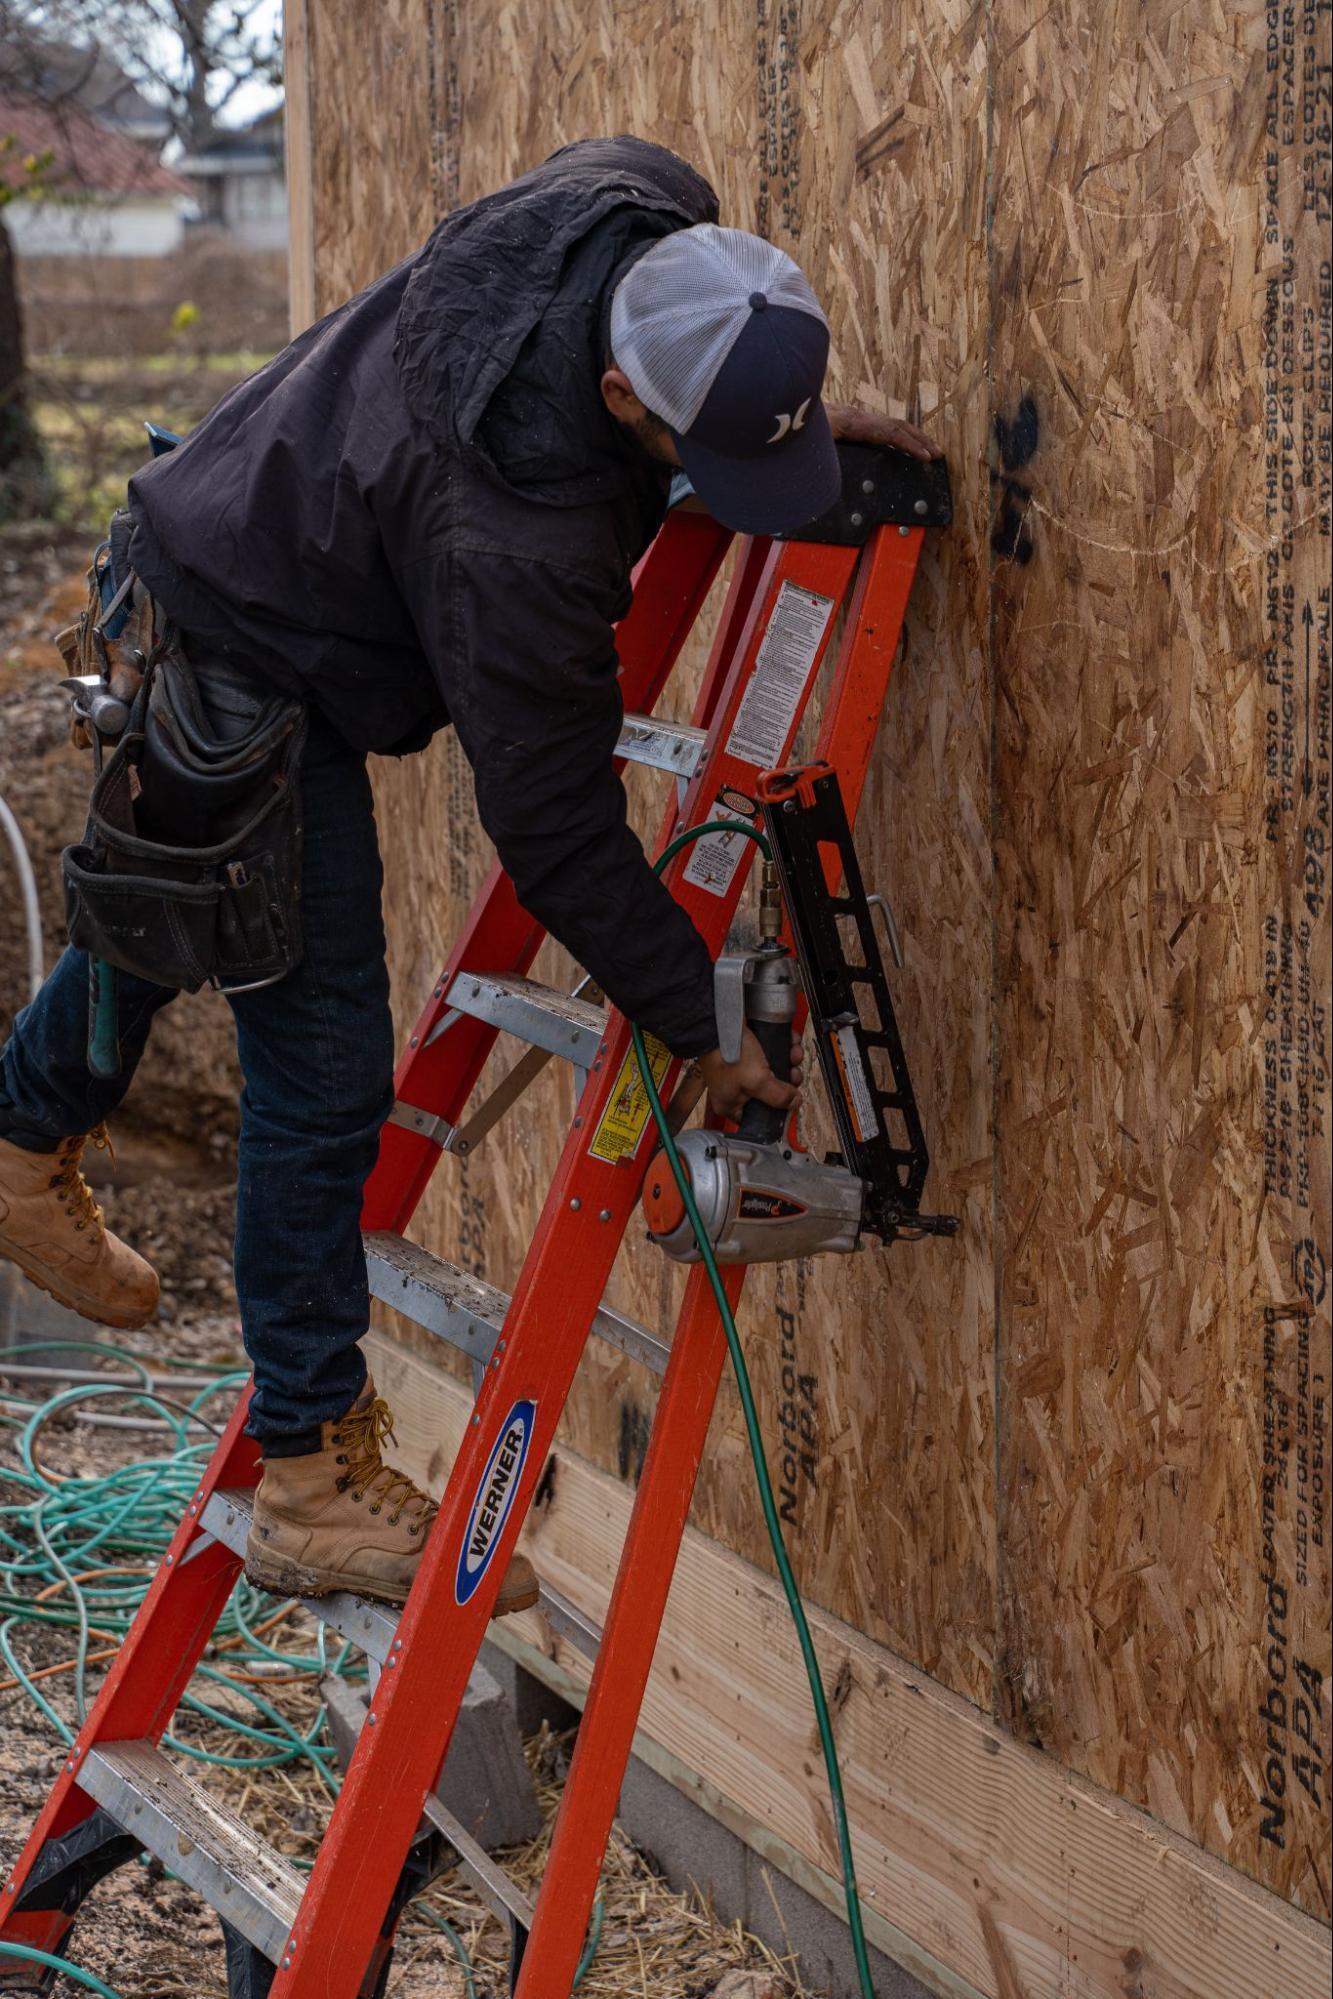
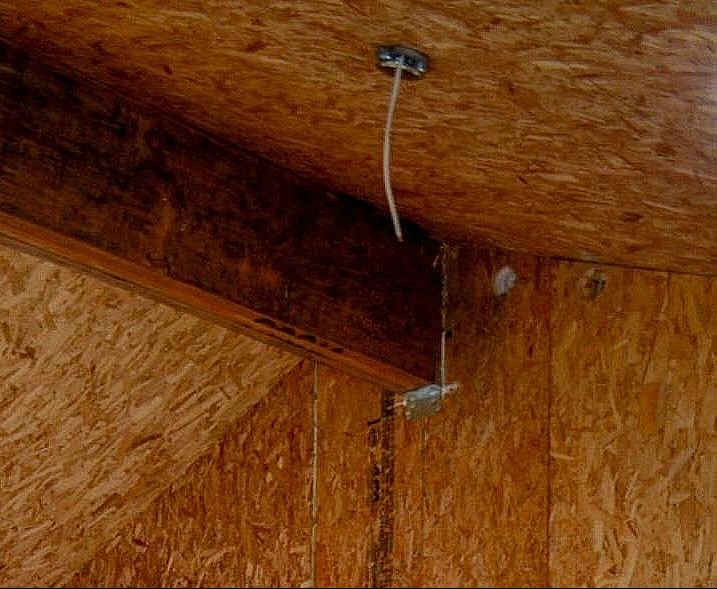
Position panels with the wiring chases closer to the bottom plate.

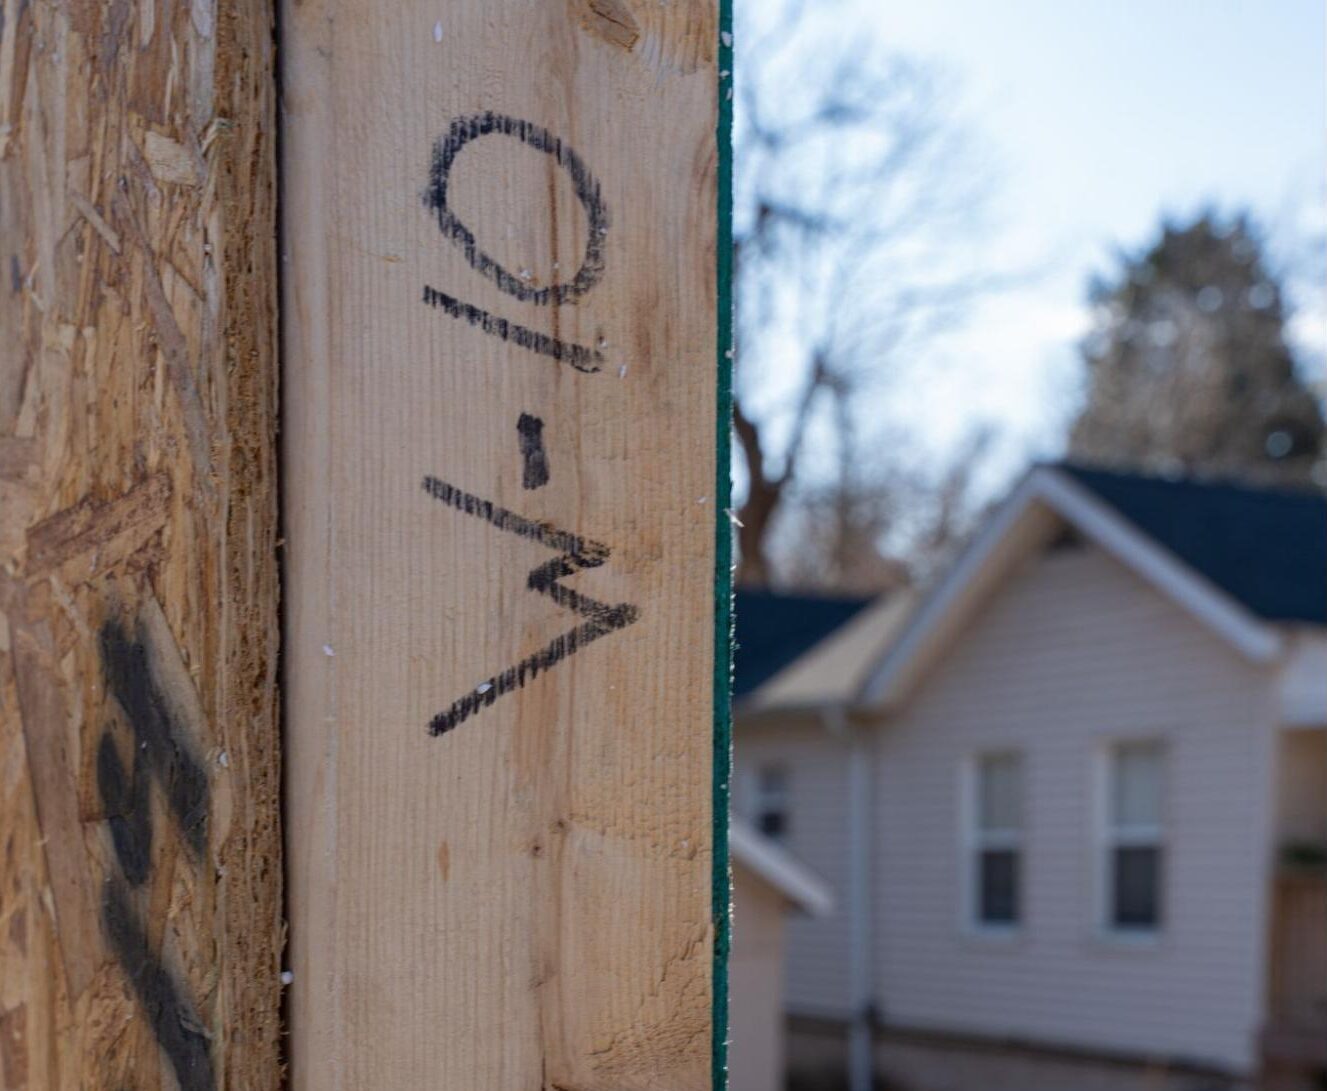
Ensure both panels are positioned with the inside in and the outside out. The panel number is spray-painted on the outside of each panel.
Ensure both panels can sit flush with the floor. If an anchor bolt is in the way, you may need to cut out a little bit of foam from the panel.

Place caulk on the bottom plate or under the panel along the foam.
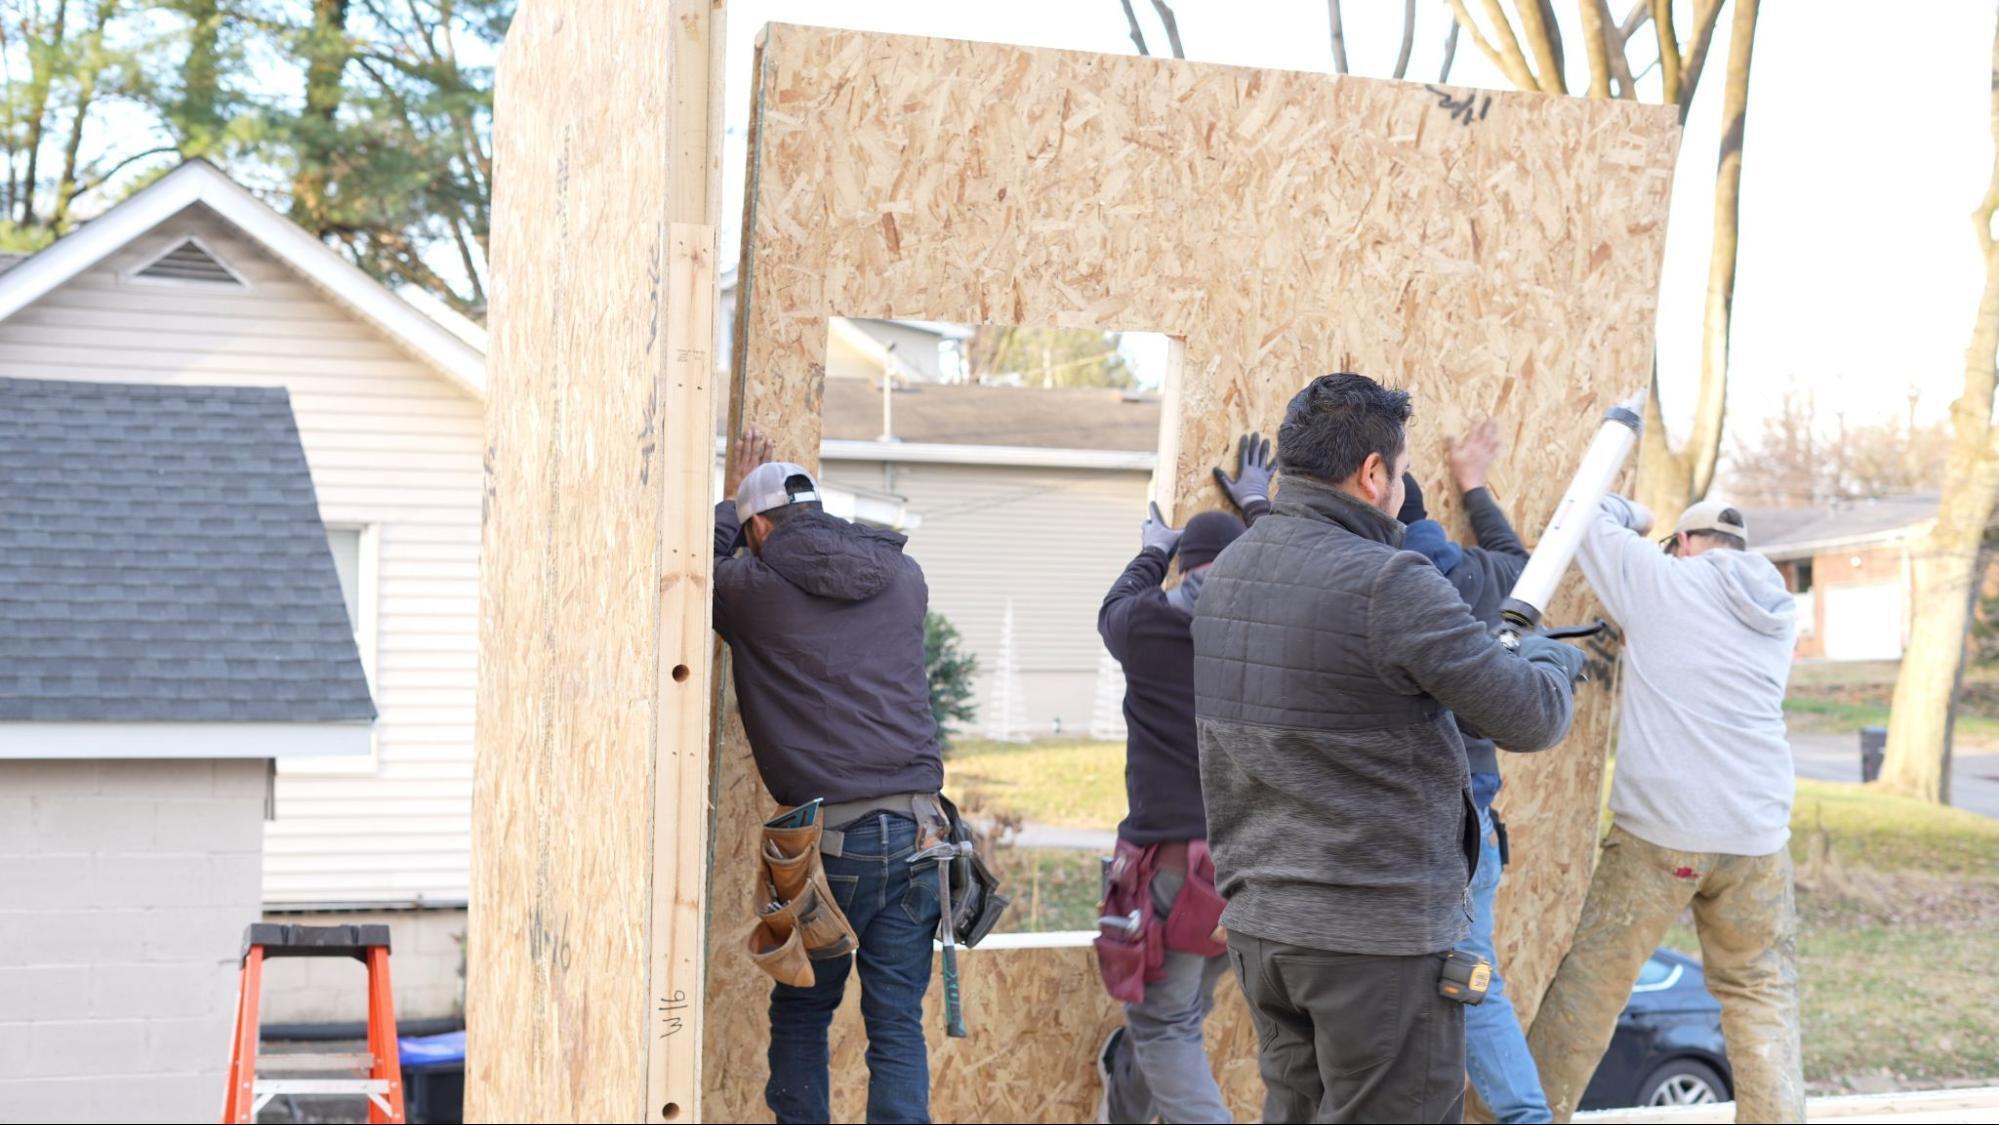
Carry the panel to the corner and set on skin along the plate, then tilt the panel up and over the bottom plate. Bevelling the bottom plate can help the SIP slide over it more easily.
Once the panel is down, move it into place. If you cannot push it, you may use a sledgehammer or mallet to help move the panel left or right.
Important: Before nailing the panel in place, be sure it is plumb and square and flat on the bottom.
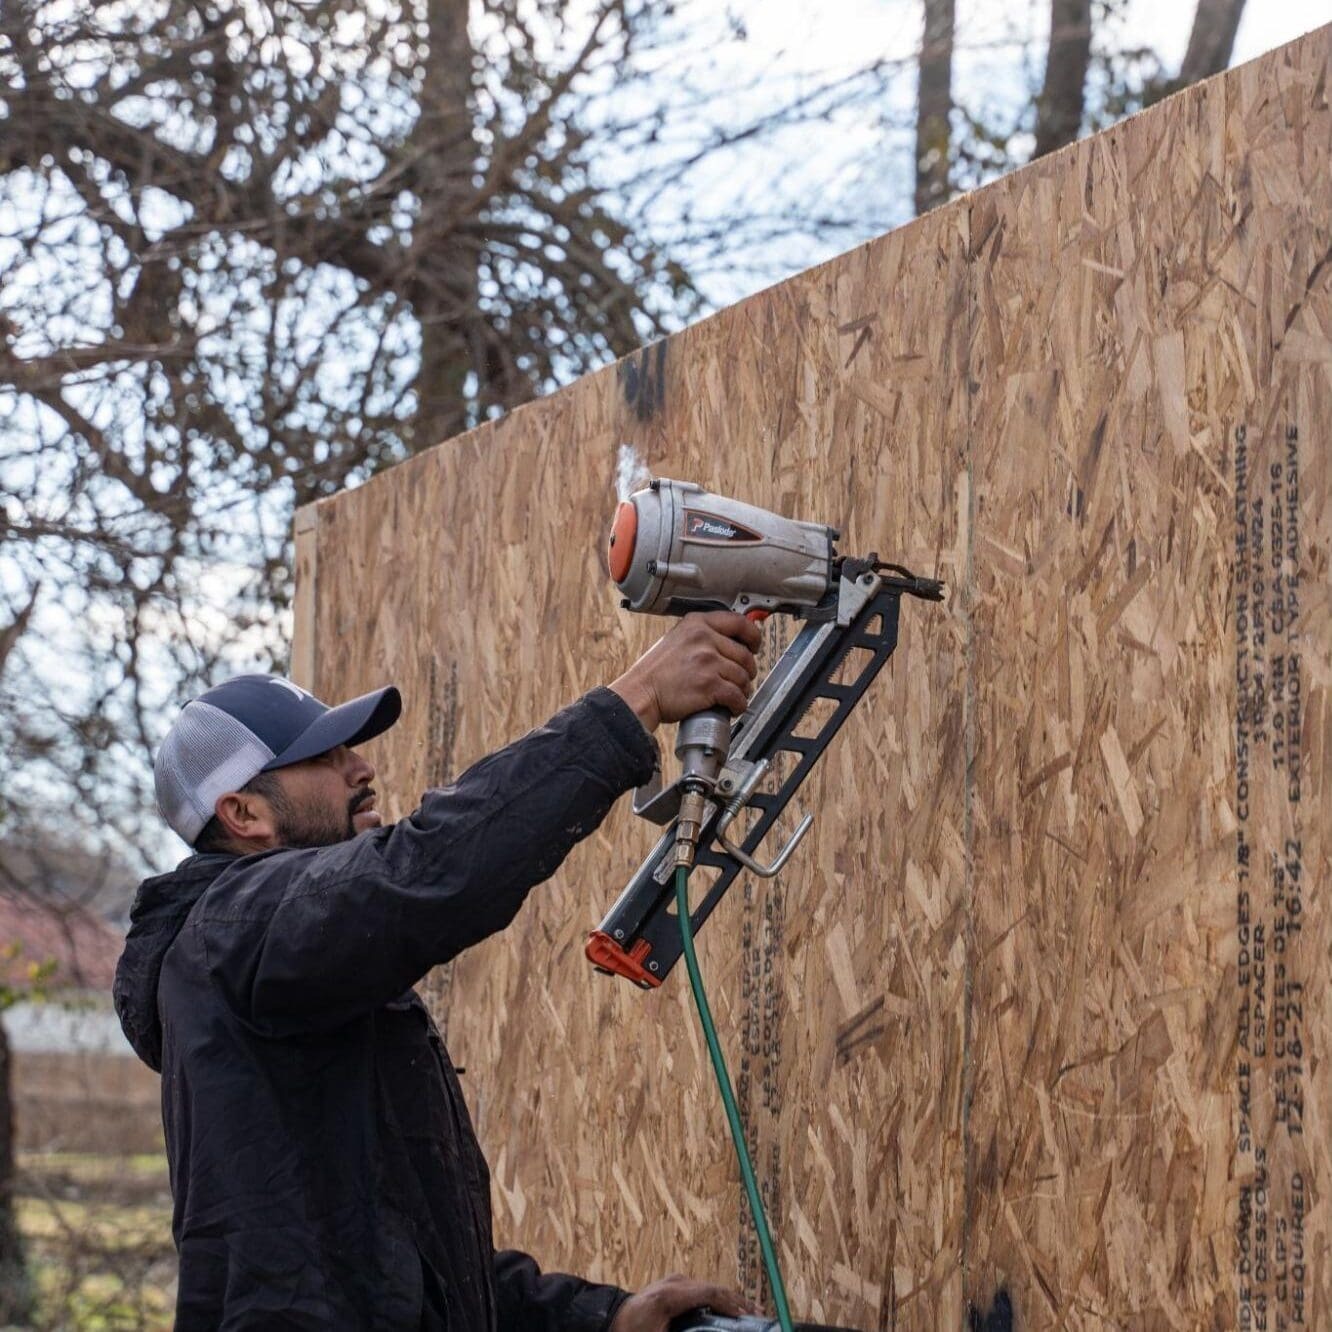
Step 4: Place Remaining Wall Panels
Look at your plans again to decide which direction to take. Once again, consider how you can work toward your unloading site to avoid having to carry the panel as far.
Do not assemble all corners first and then work toward the center of each wall; this can lead to a tight connection on the last panel of each wall.
Once you have decided on a direction, consult the plans provided and locate the panel number you need.
Make sure the joint of the panel is already standing and will accept the panel you are ready to place. The lumber should already be in one or the other panels, not both. If not, you may have the panel backward.
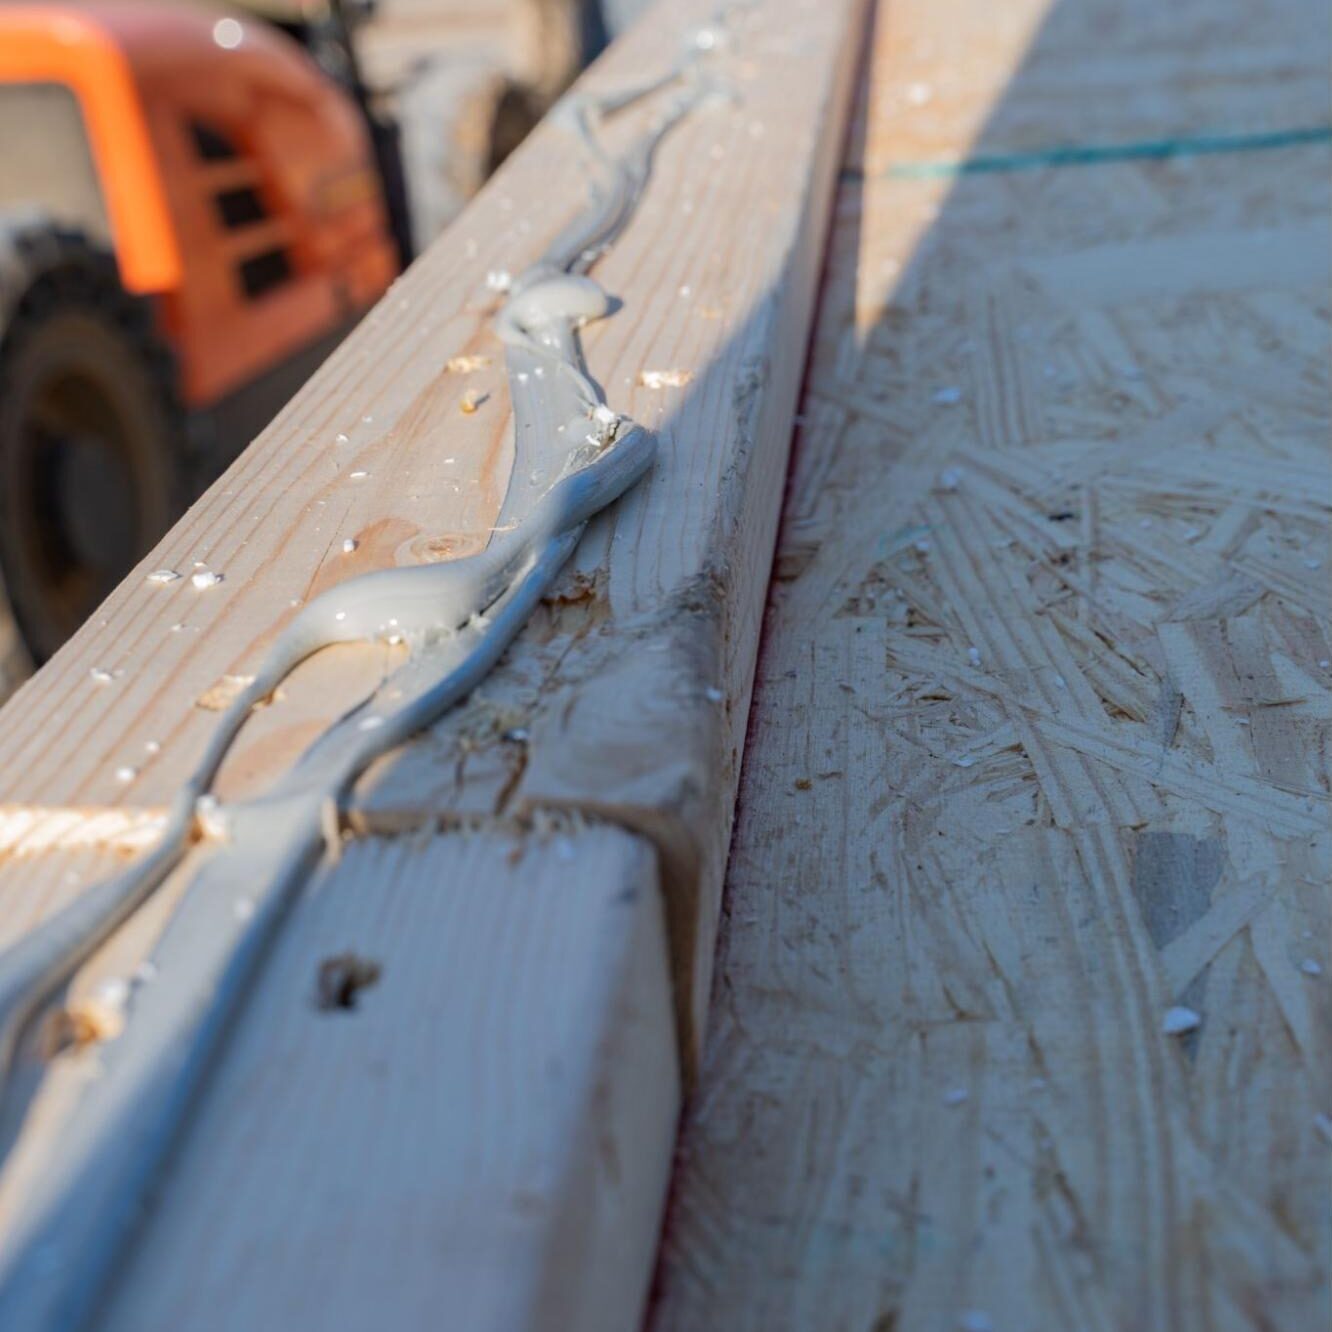
Place a thick bead of caulk along the bottom of the panel or on the plate and along the vertical connecting joint.
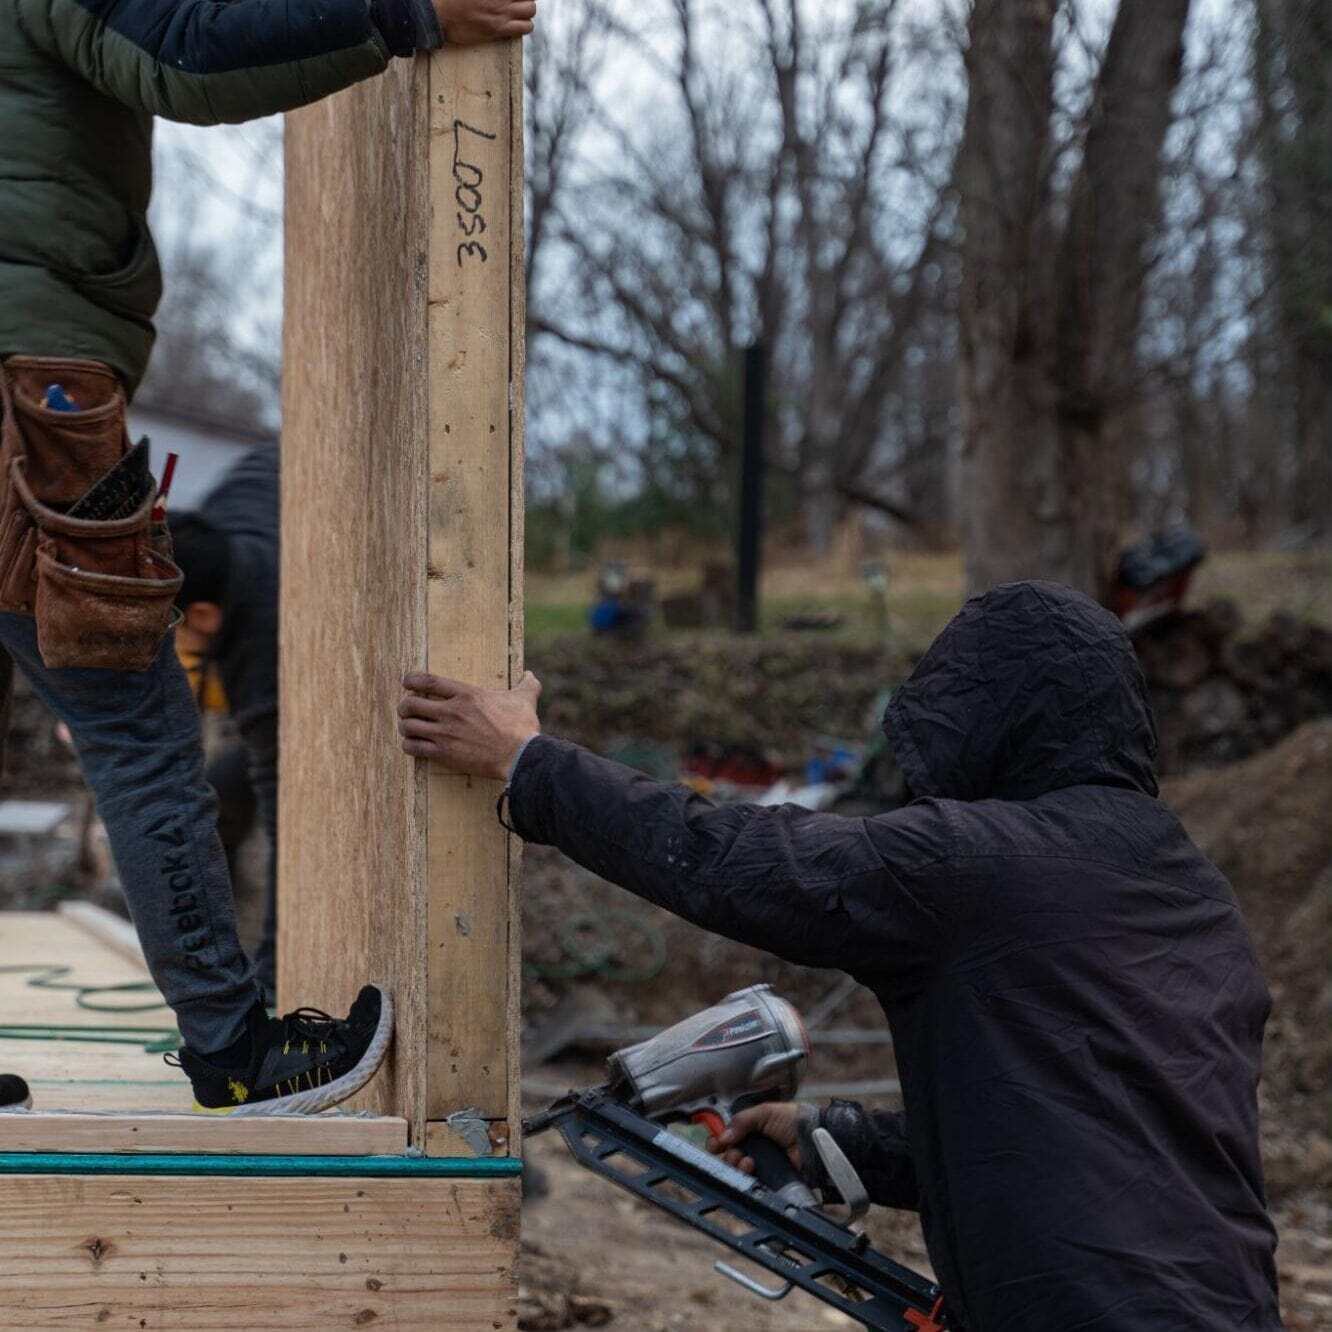
Slide the new panel over the plate, then, using a block of wood to protect the edges, gently tap the new panel over the spline joint of the first panel until the two-panel skins come together. (Note that they may not come together perfectly inside and out.)
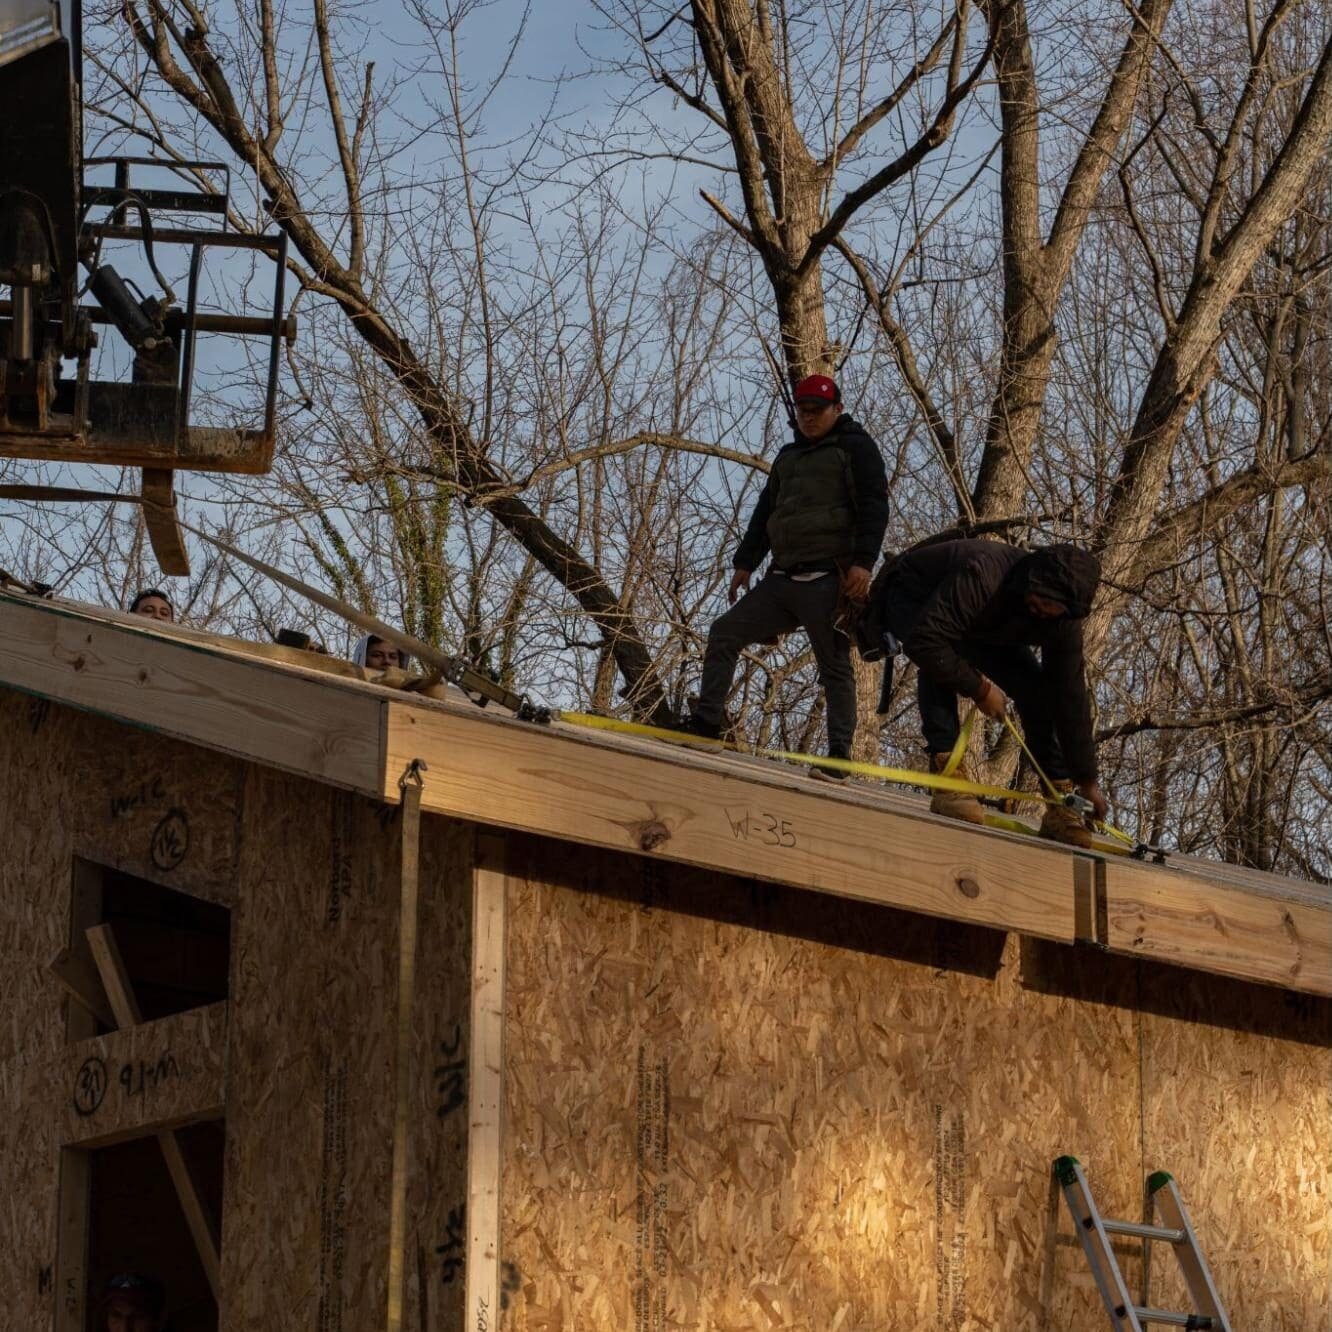
If you cannot connect the SIPs with the sledgehammer or by hand, you may need to use the lifting plates and ratchet straps.
Place one plate on each side of the joint. Place screws in the plate on the further side of the joint. Put your ratchet straps between the plates, connect them, and use the ratchet to pull the joint together.
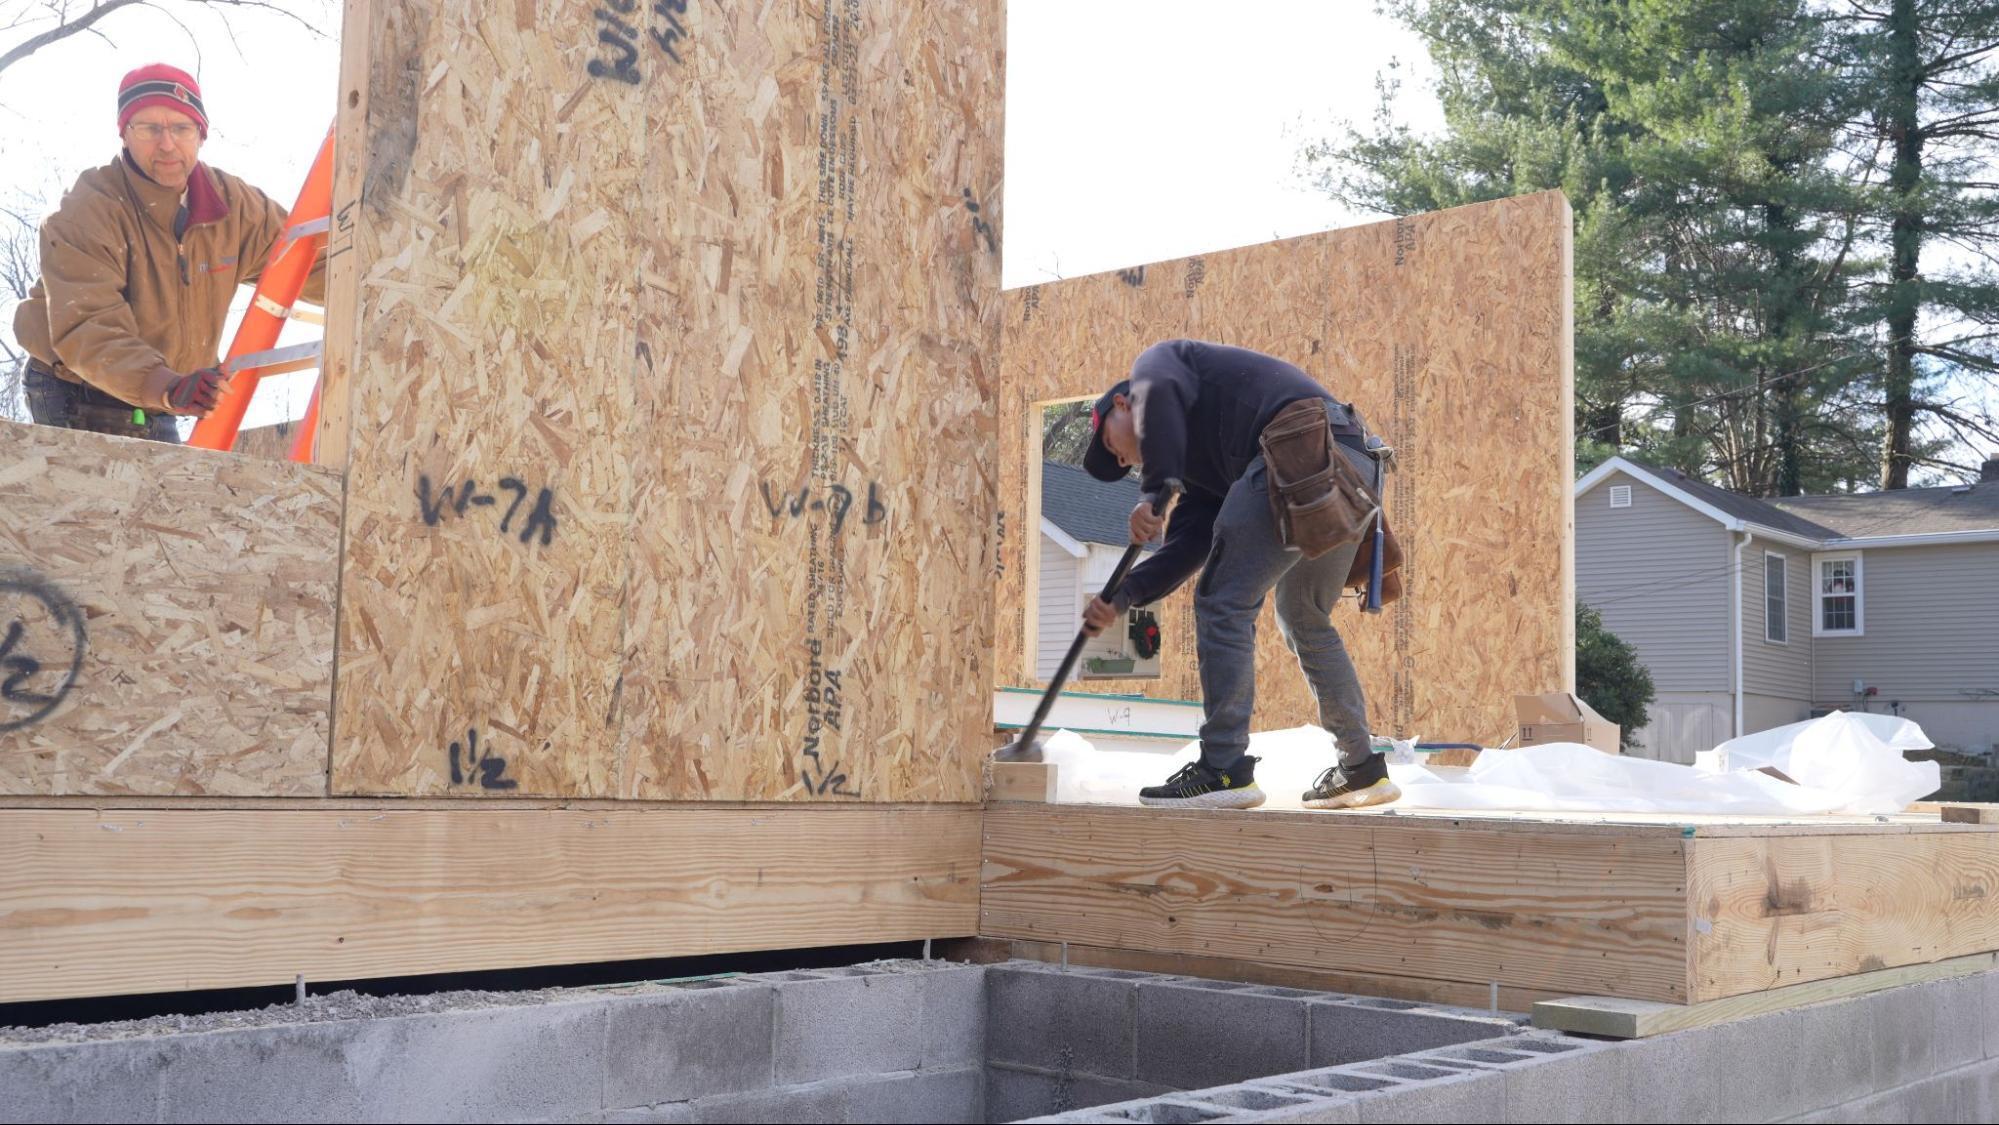
Make sure the panels are plumb and level. Nail along the bottom and the connection joint on center.
Continue this process until you reach the next corner, then follow the corner process again.
Step 5: Level the Top of Panels
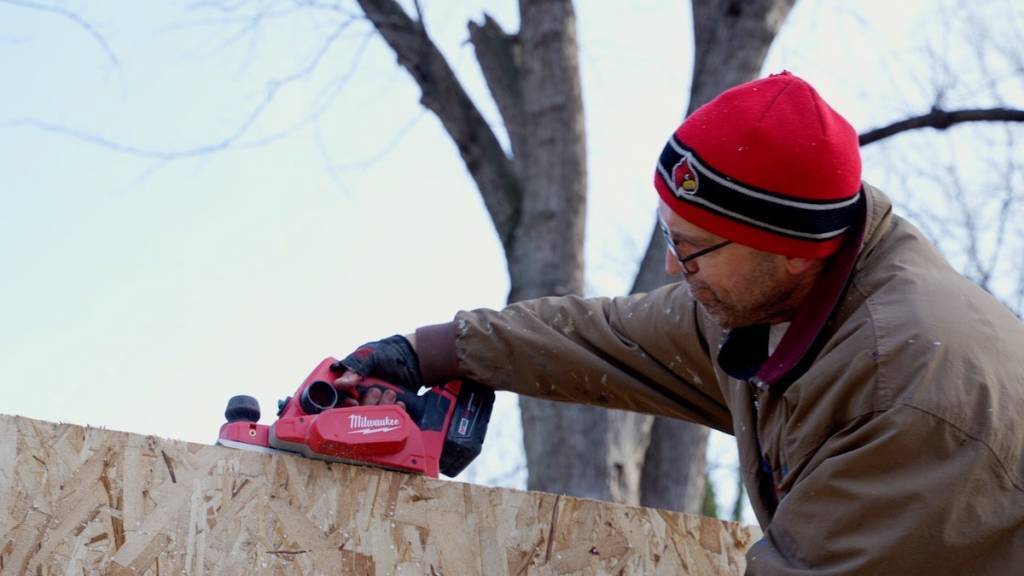
Once all the wall panels are installed, you must level off the top. Before placing the top cap (if needed) in place, use a planer to even out any edges of the OSB that may be sticking up higher than the adjacent panel.
Step 6: Install Ridge Beam
If you have a ridge beam, a beam pocket should has been cut into the center of the gable panels. You will set your center ridge beam using the provided laminated veneer lumber (LVL).
LVL is one of the most widely used engineered wood products for construction applications. It is a composite product manufactured from multiple thin layers of veneer aligned with the length of the finished lumber.
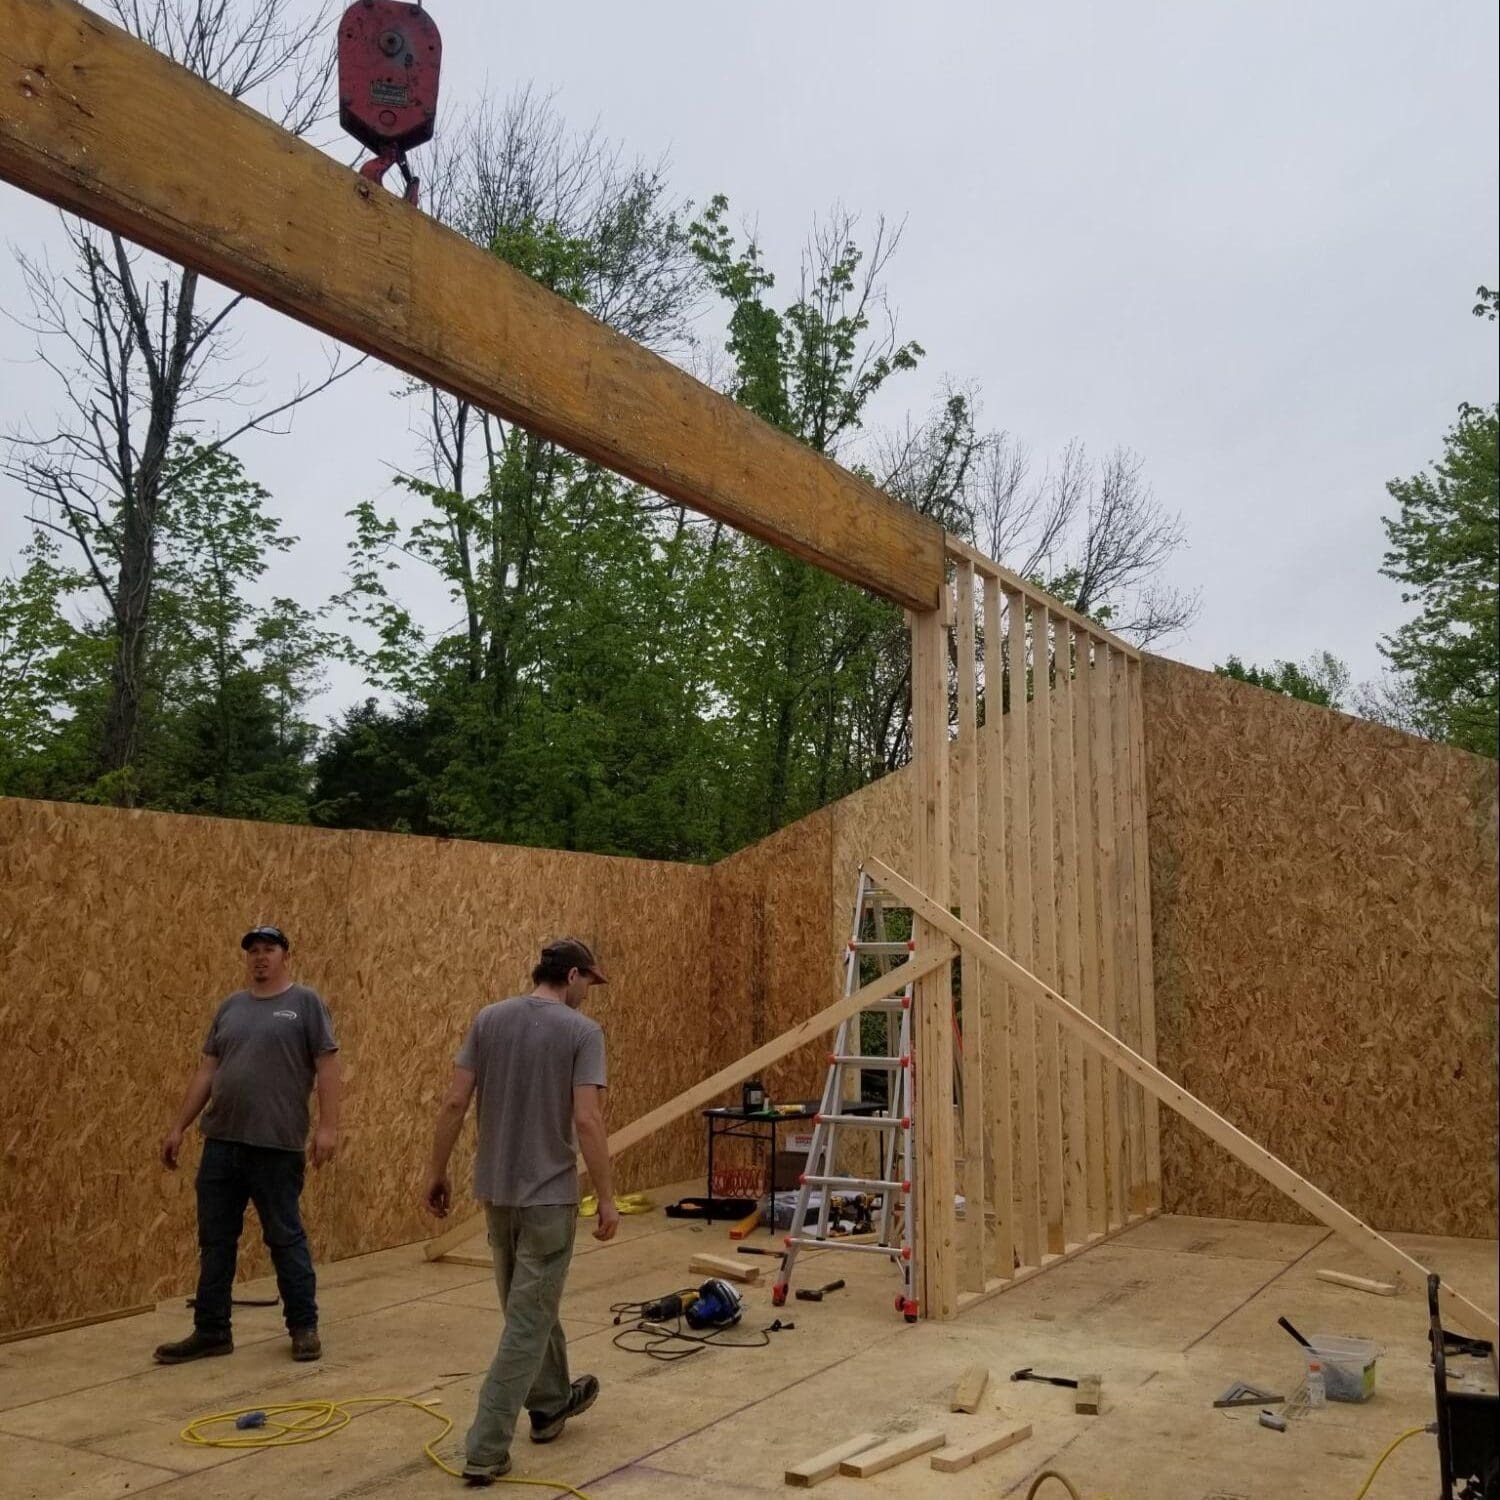
To ensure safety, use a crane or lift to handle the beam, as its weight poses a risk of injury if dropped.
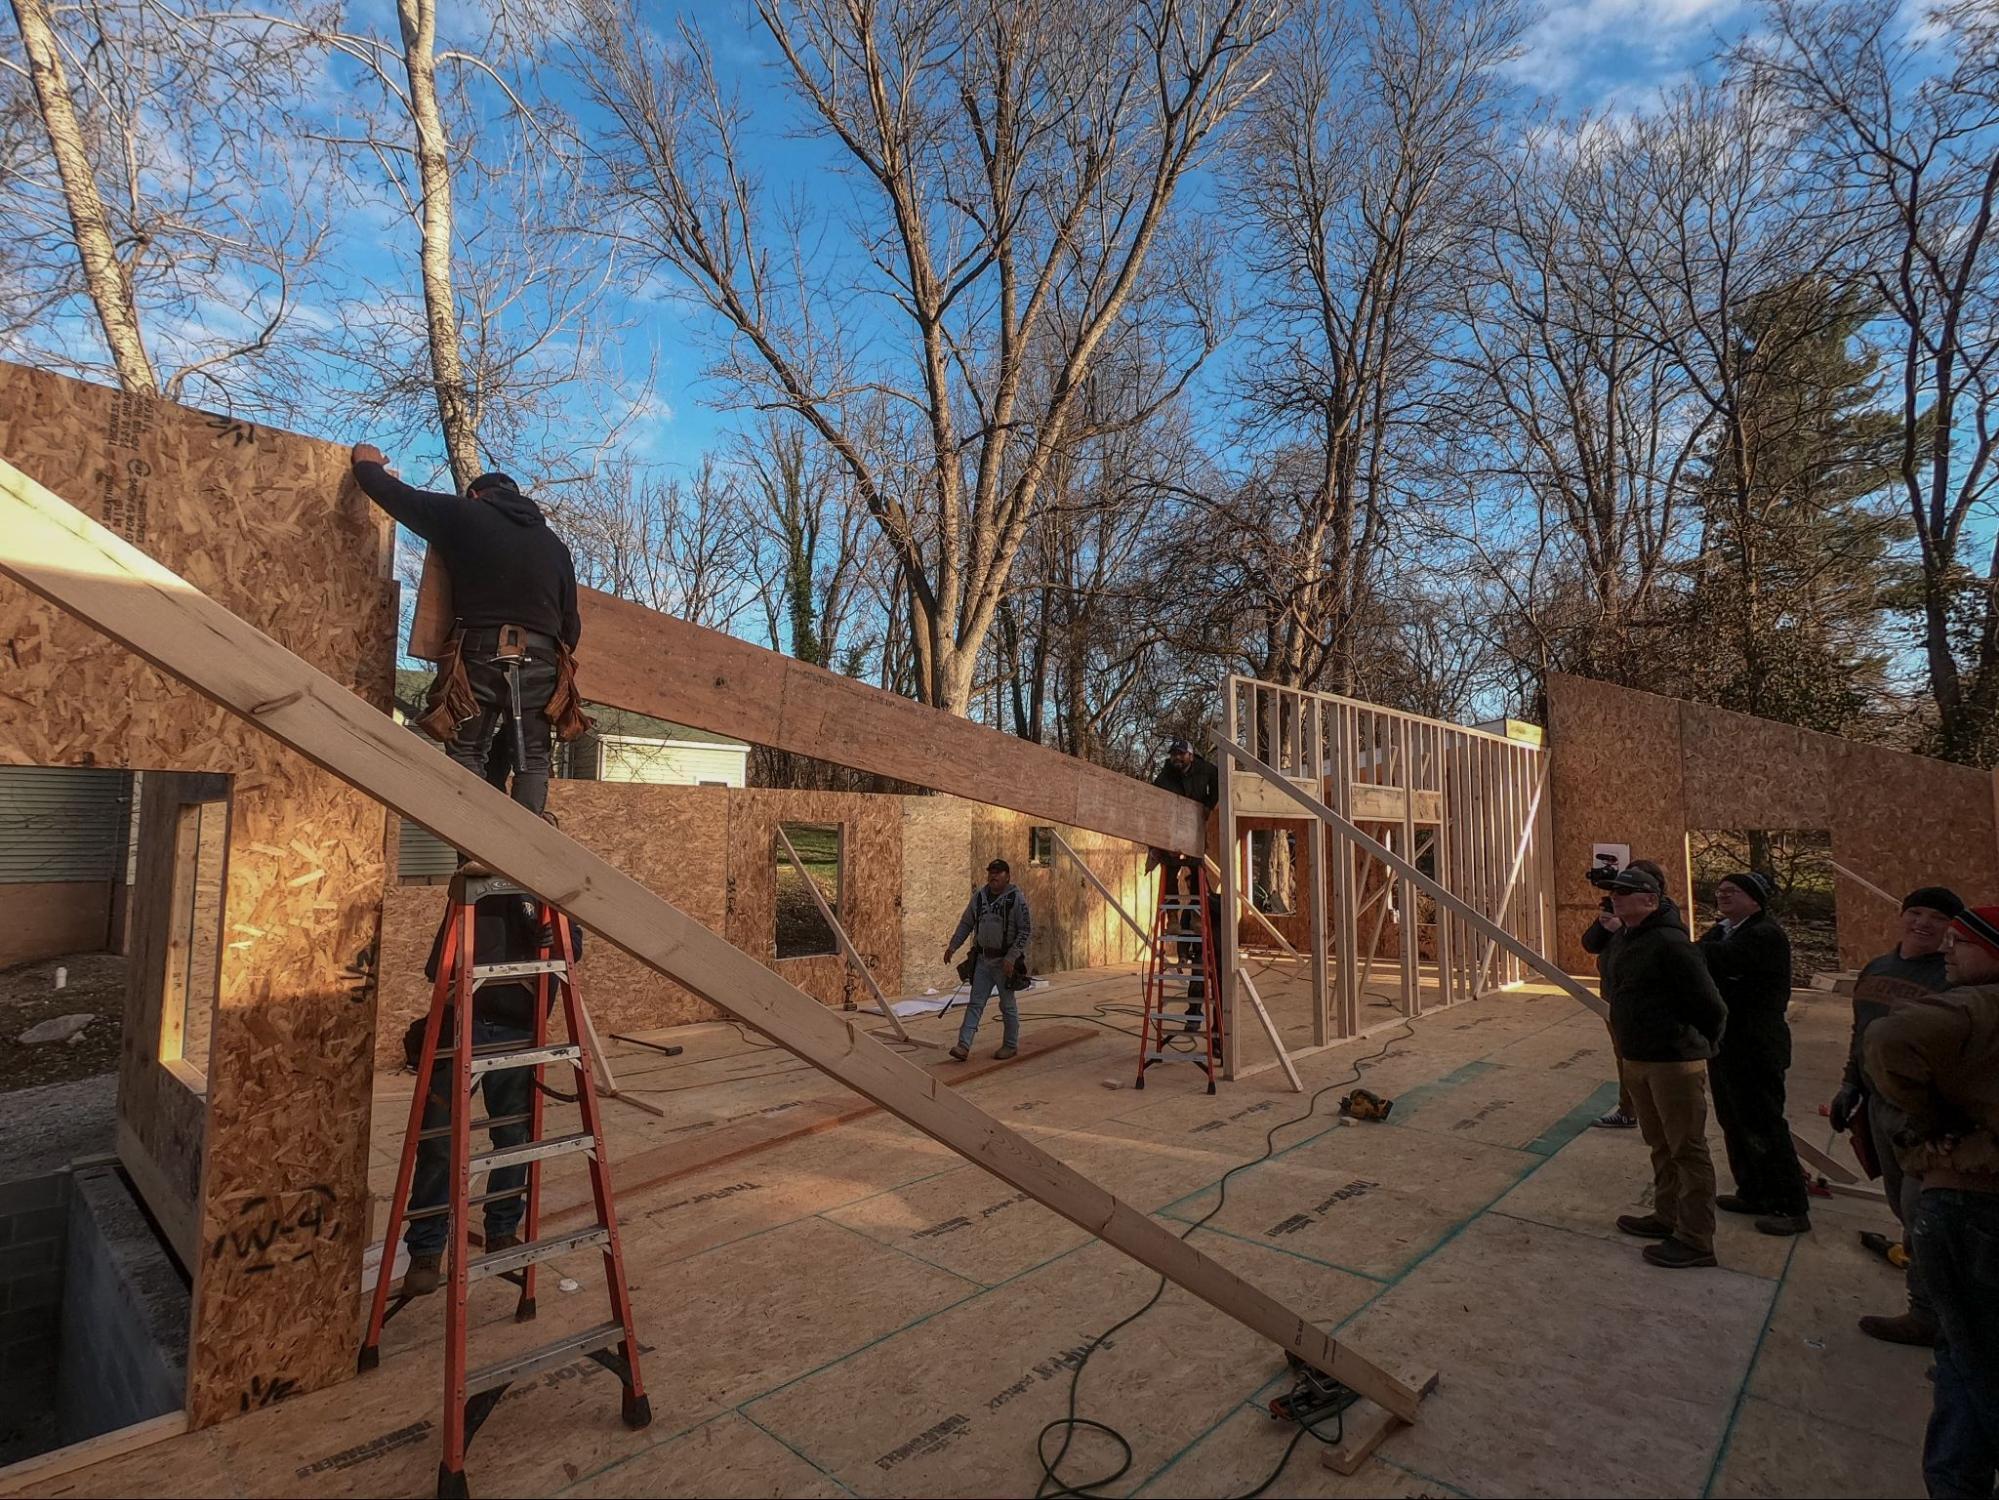
Lower the ridge beam into place in each beam pocket cut into the gable panels. The top of the beam and the panels should align.
Later, return to apply expanding foam sealant around the joints where the beam sits. The pocket is usually cut slightly wider than the beam to facilitate installation. Fill these gaps with the expanding foam sealant.
If you do NOT have a ridge beam, the steps are still the same, but the panels rest on either walls or interior supports.
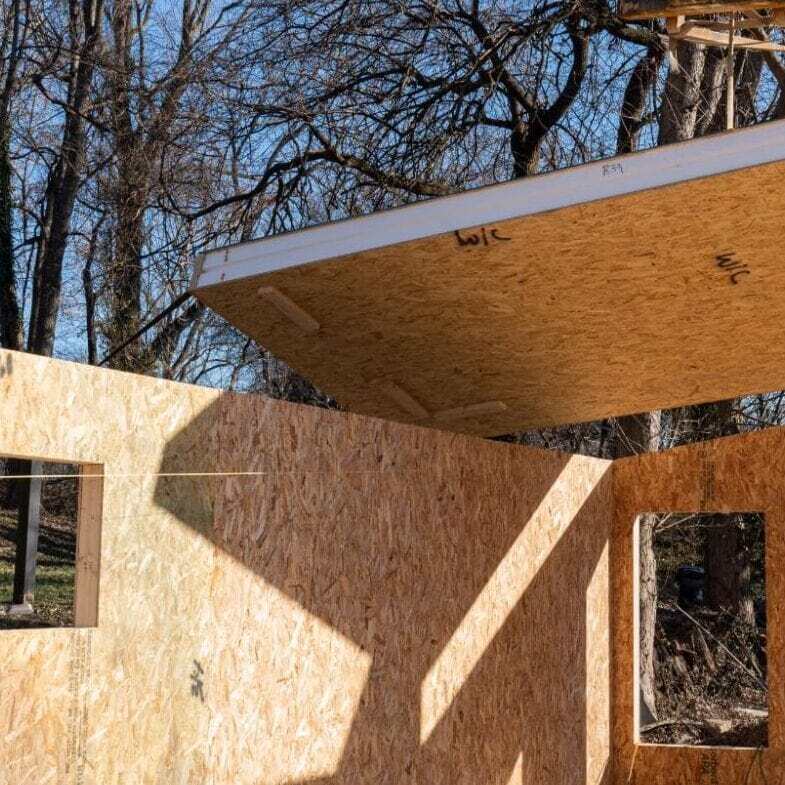
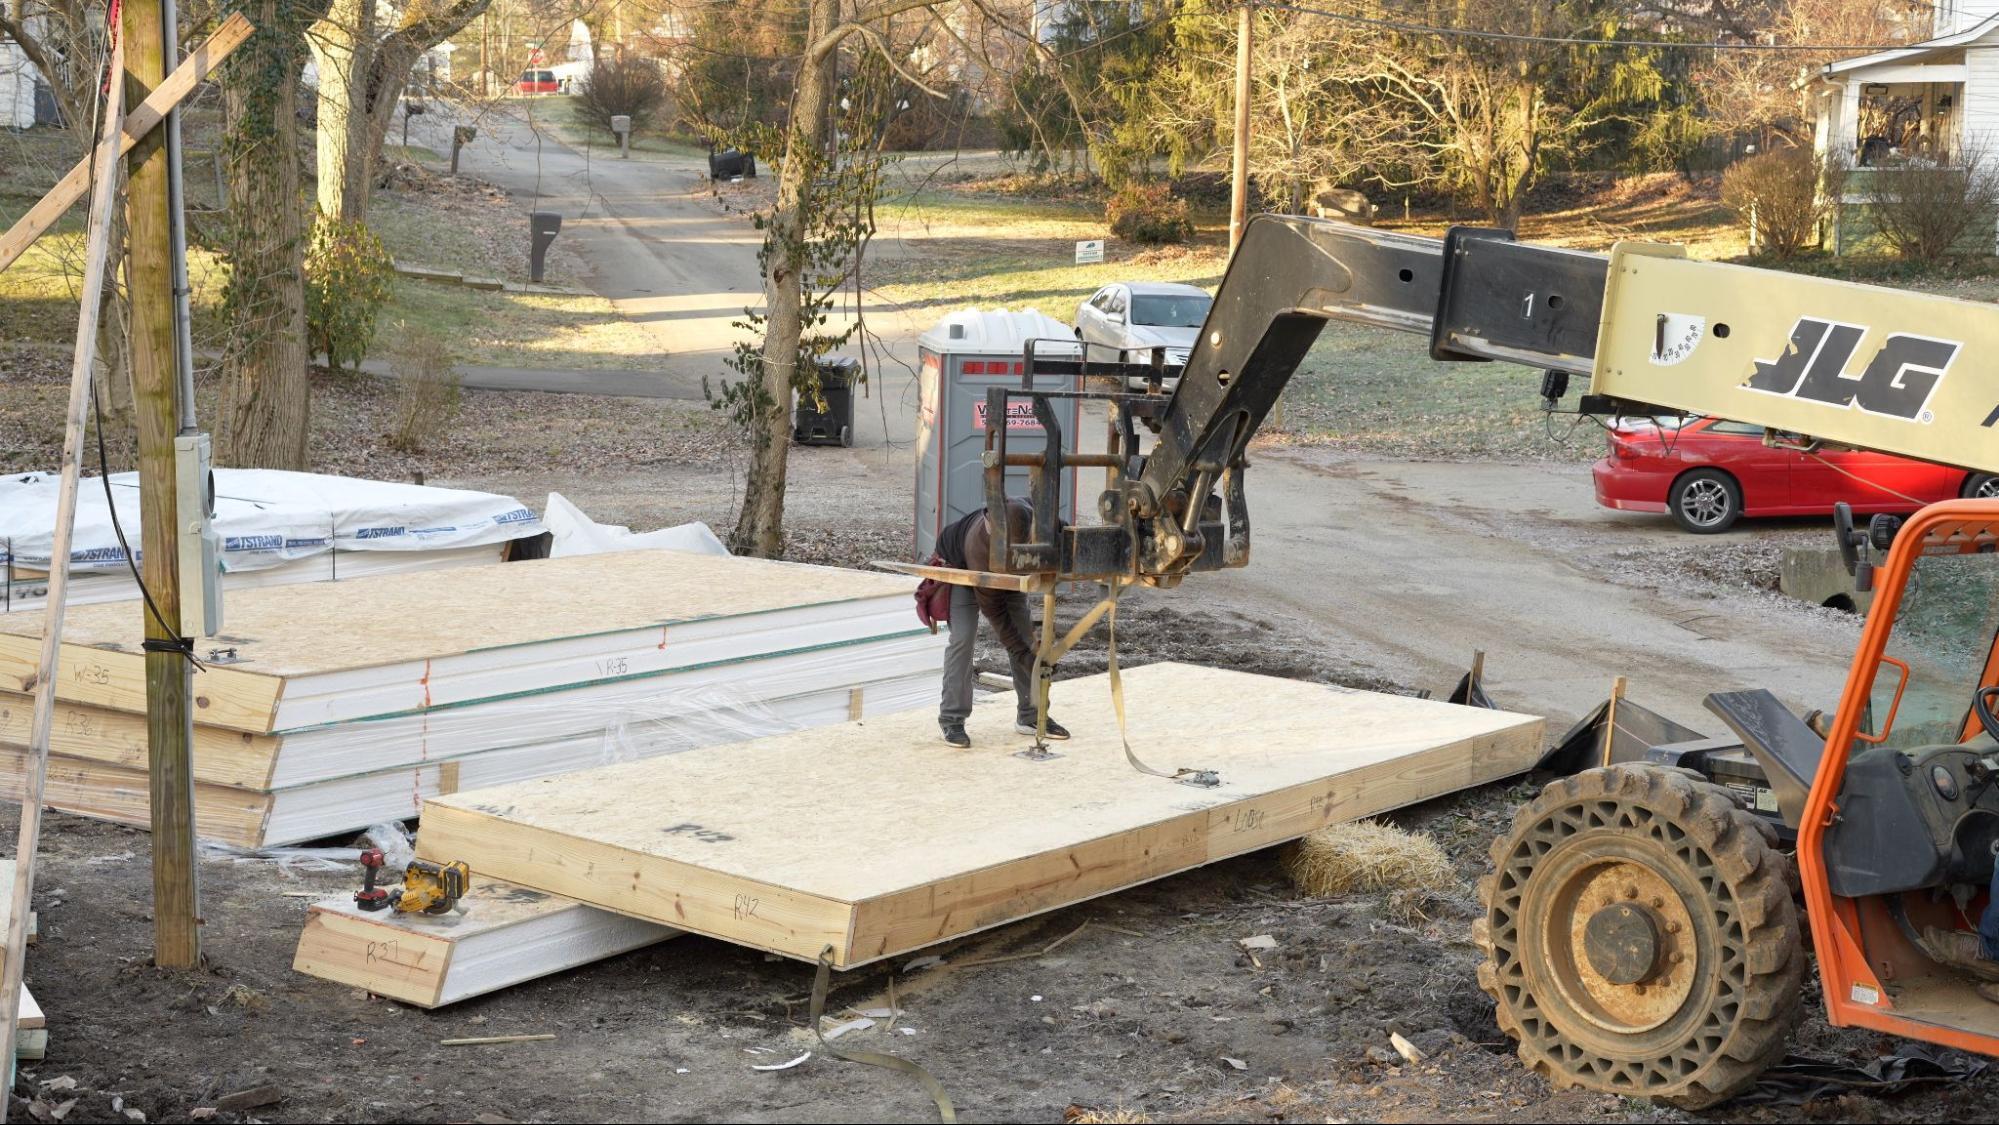
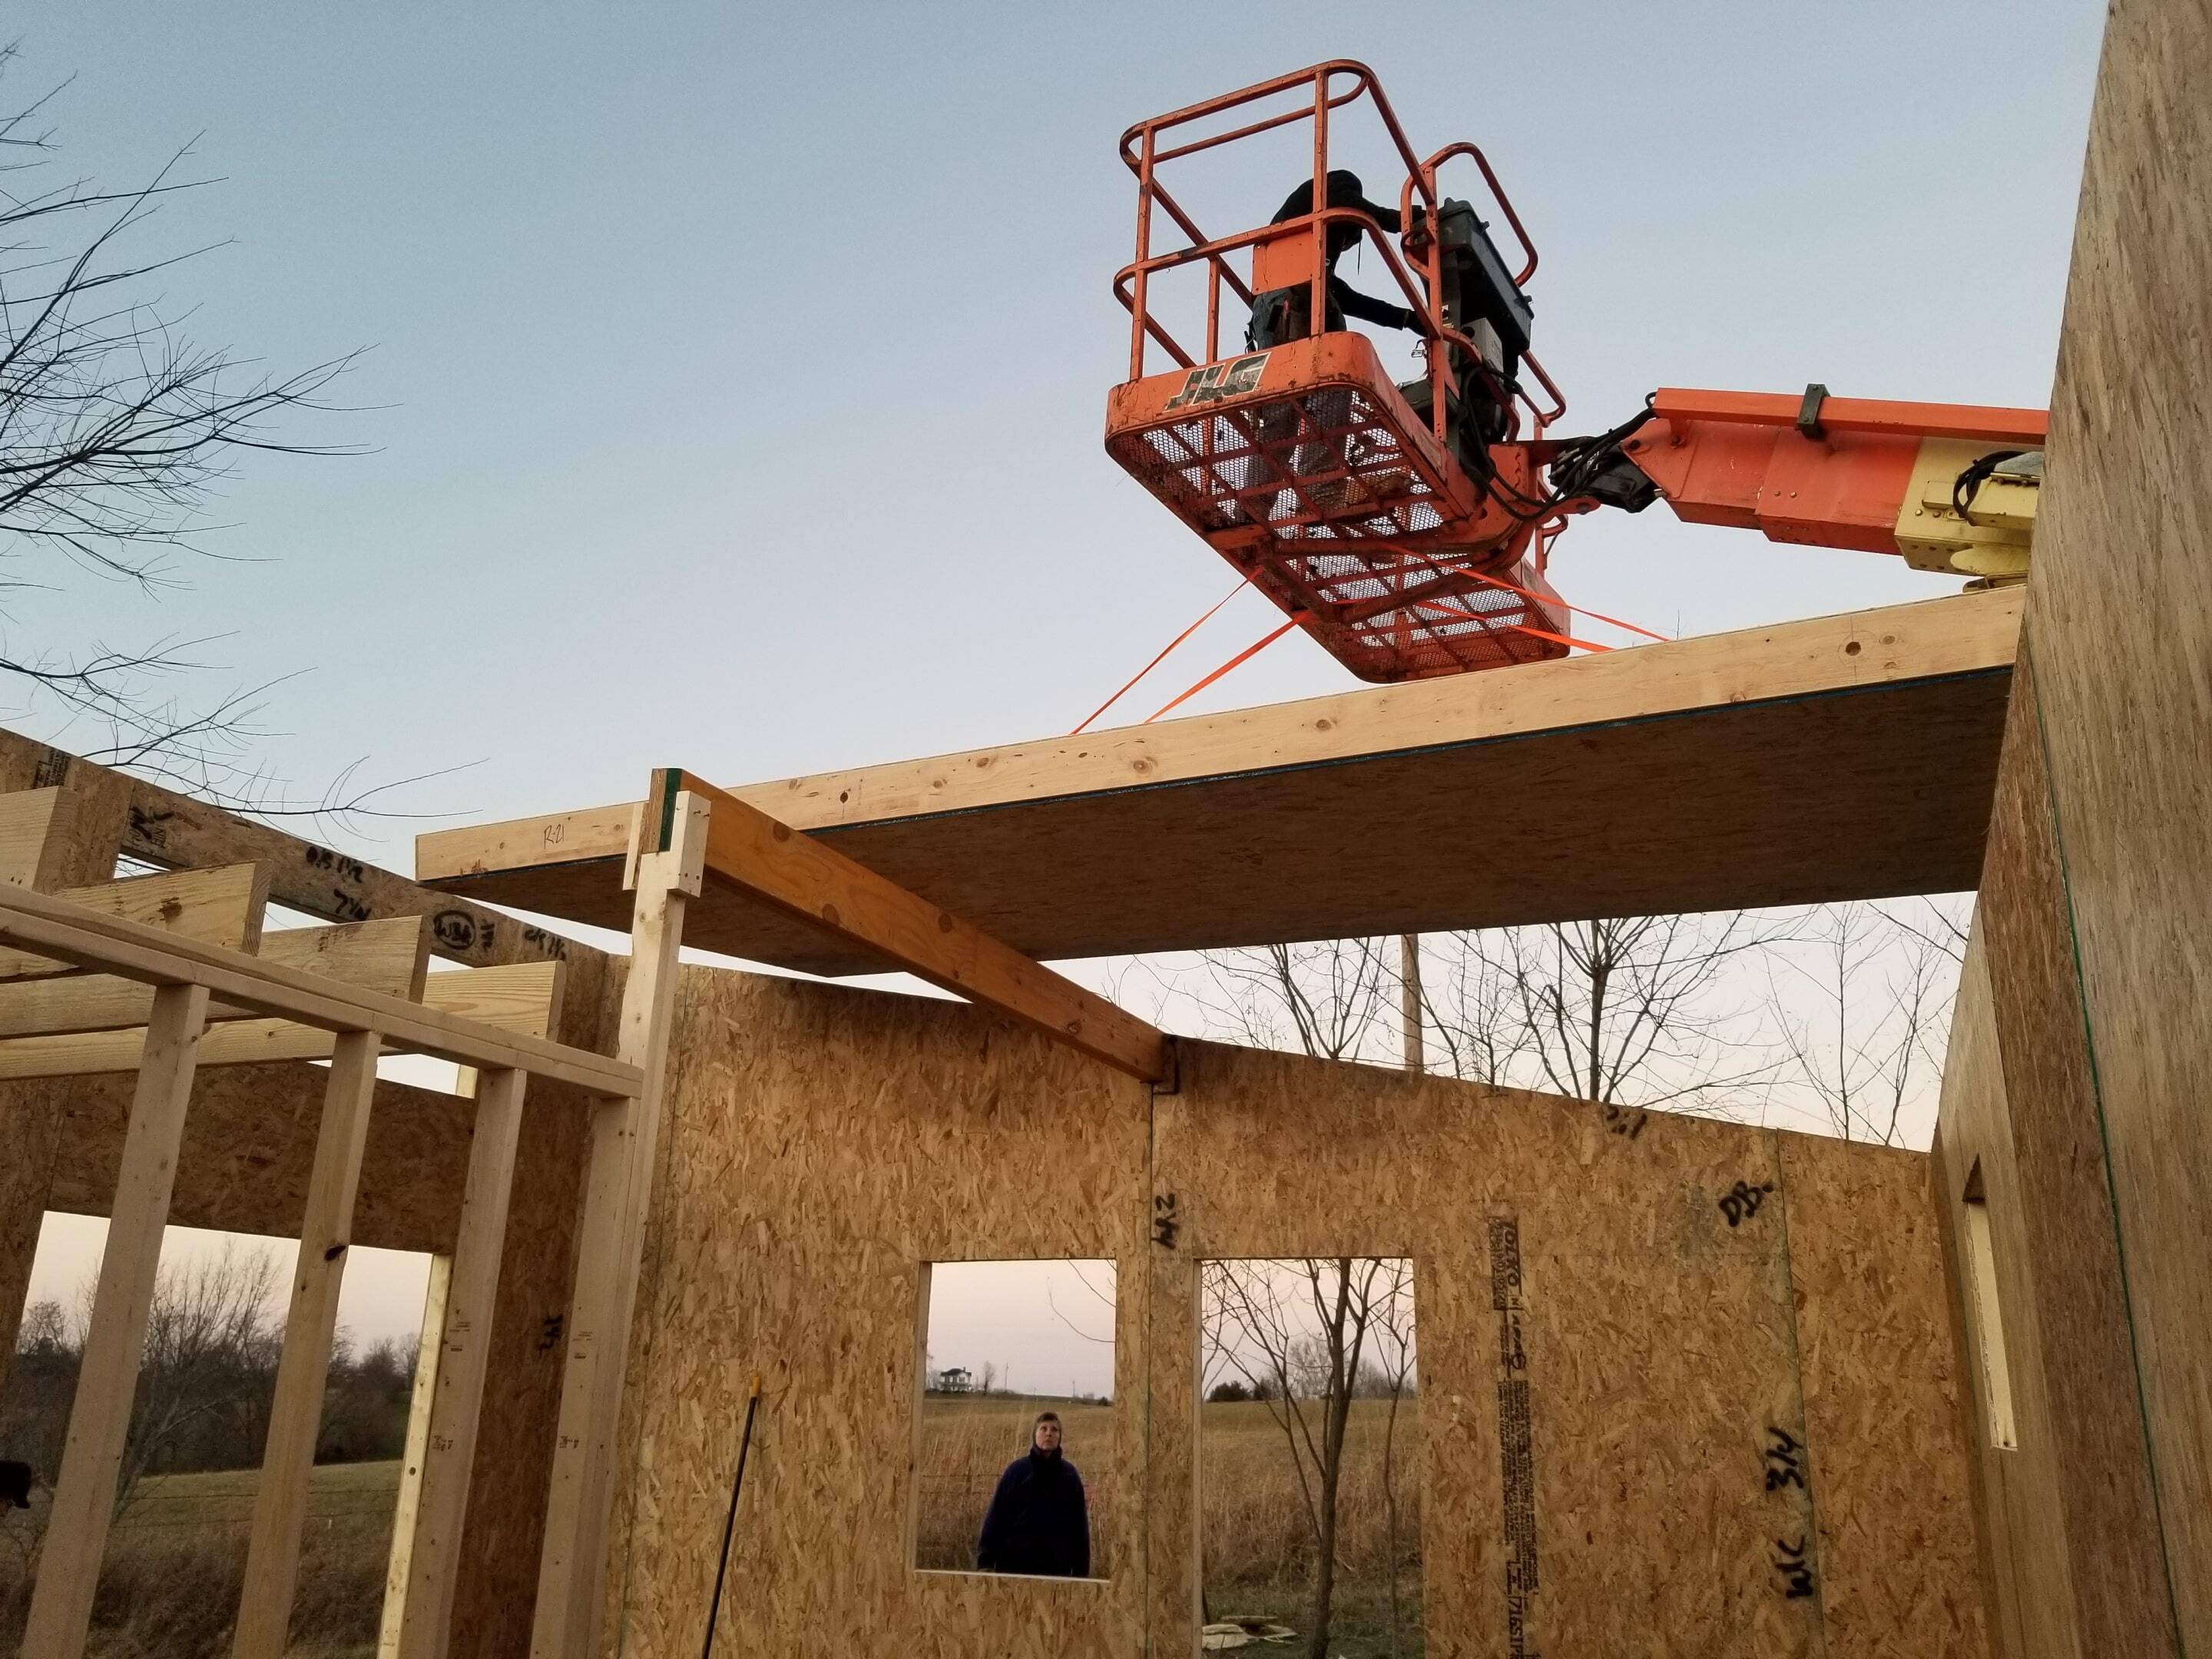
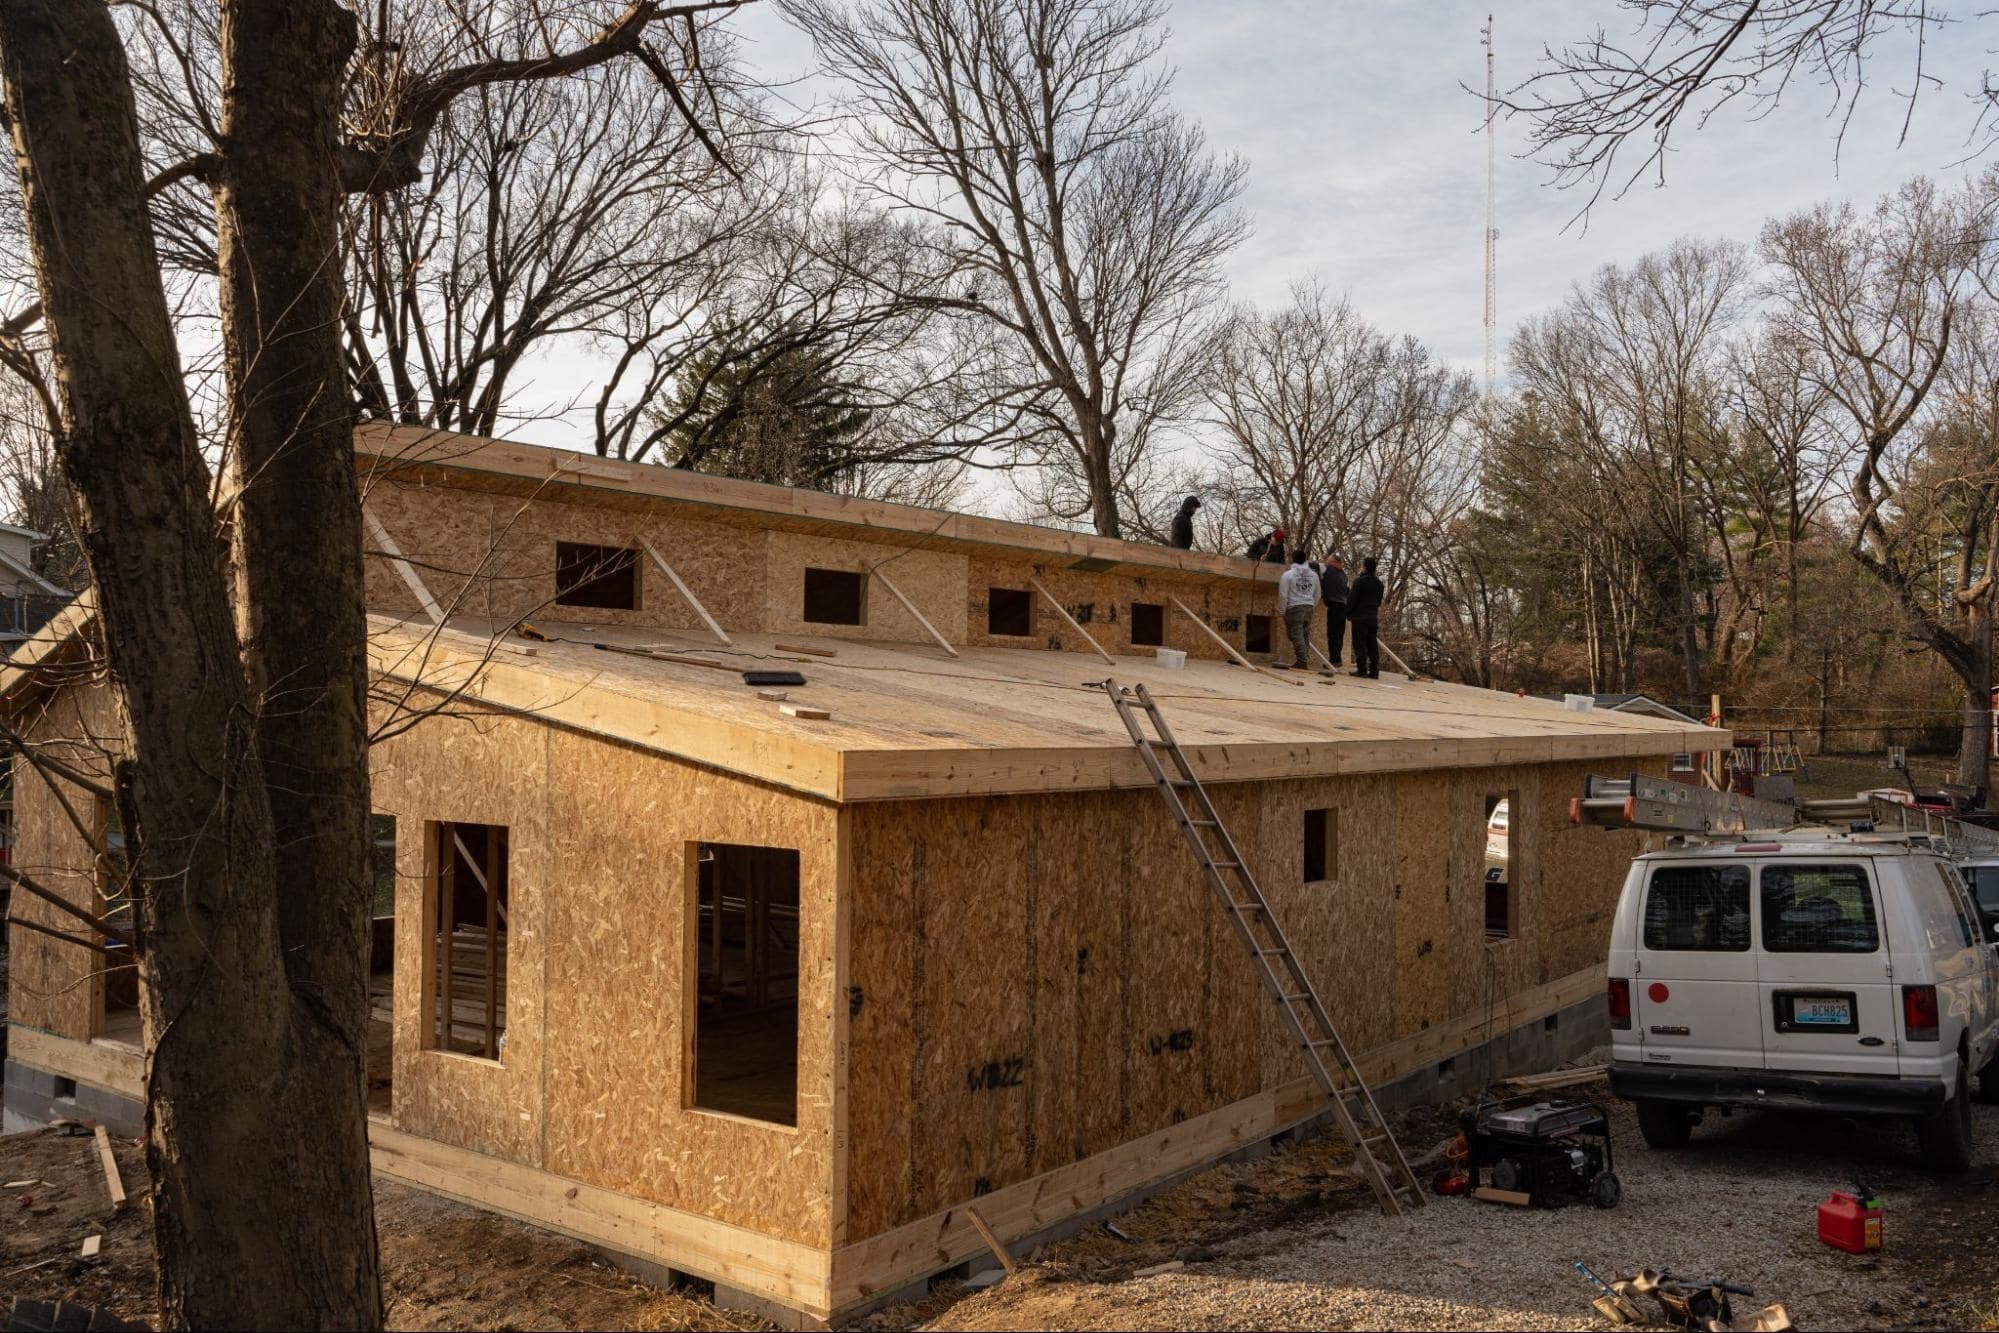
Step 7: Place Starter Roof Panels
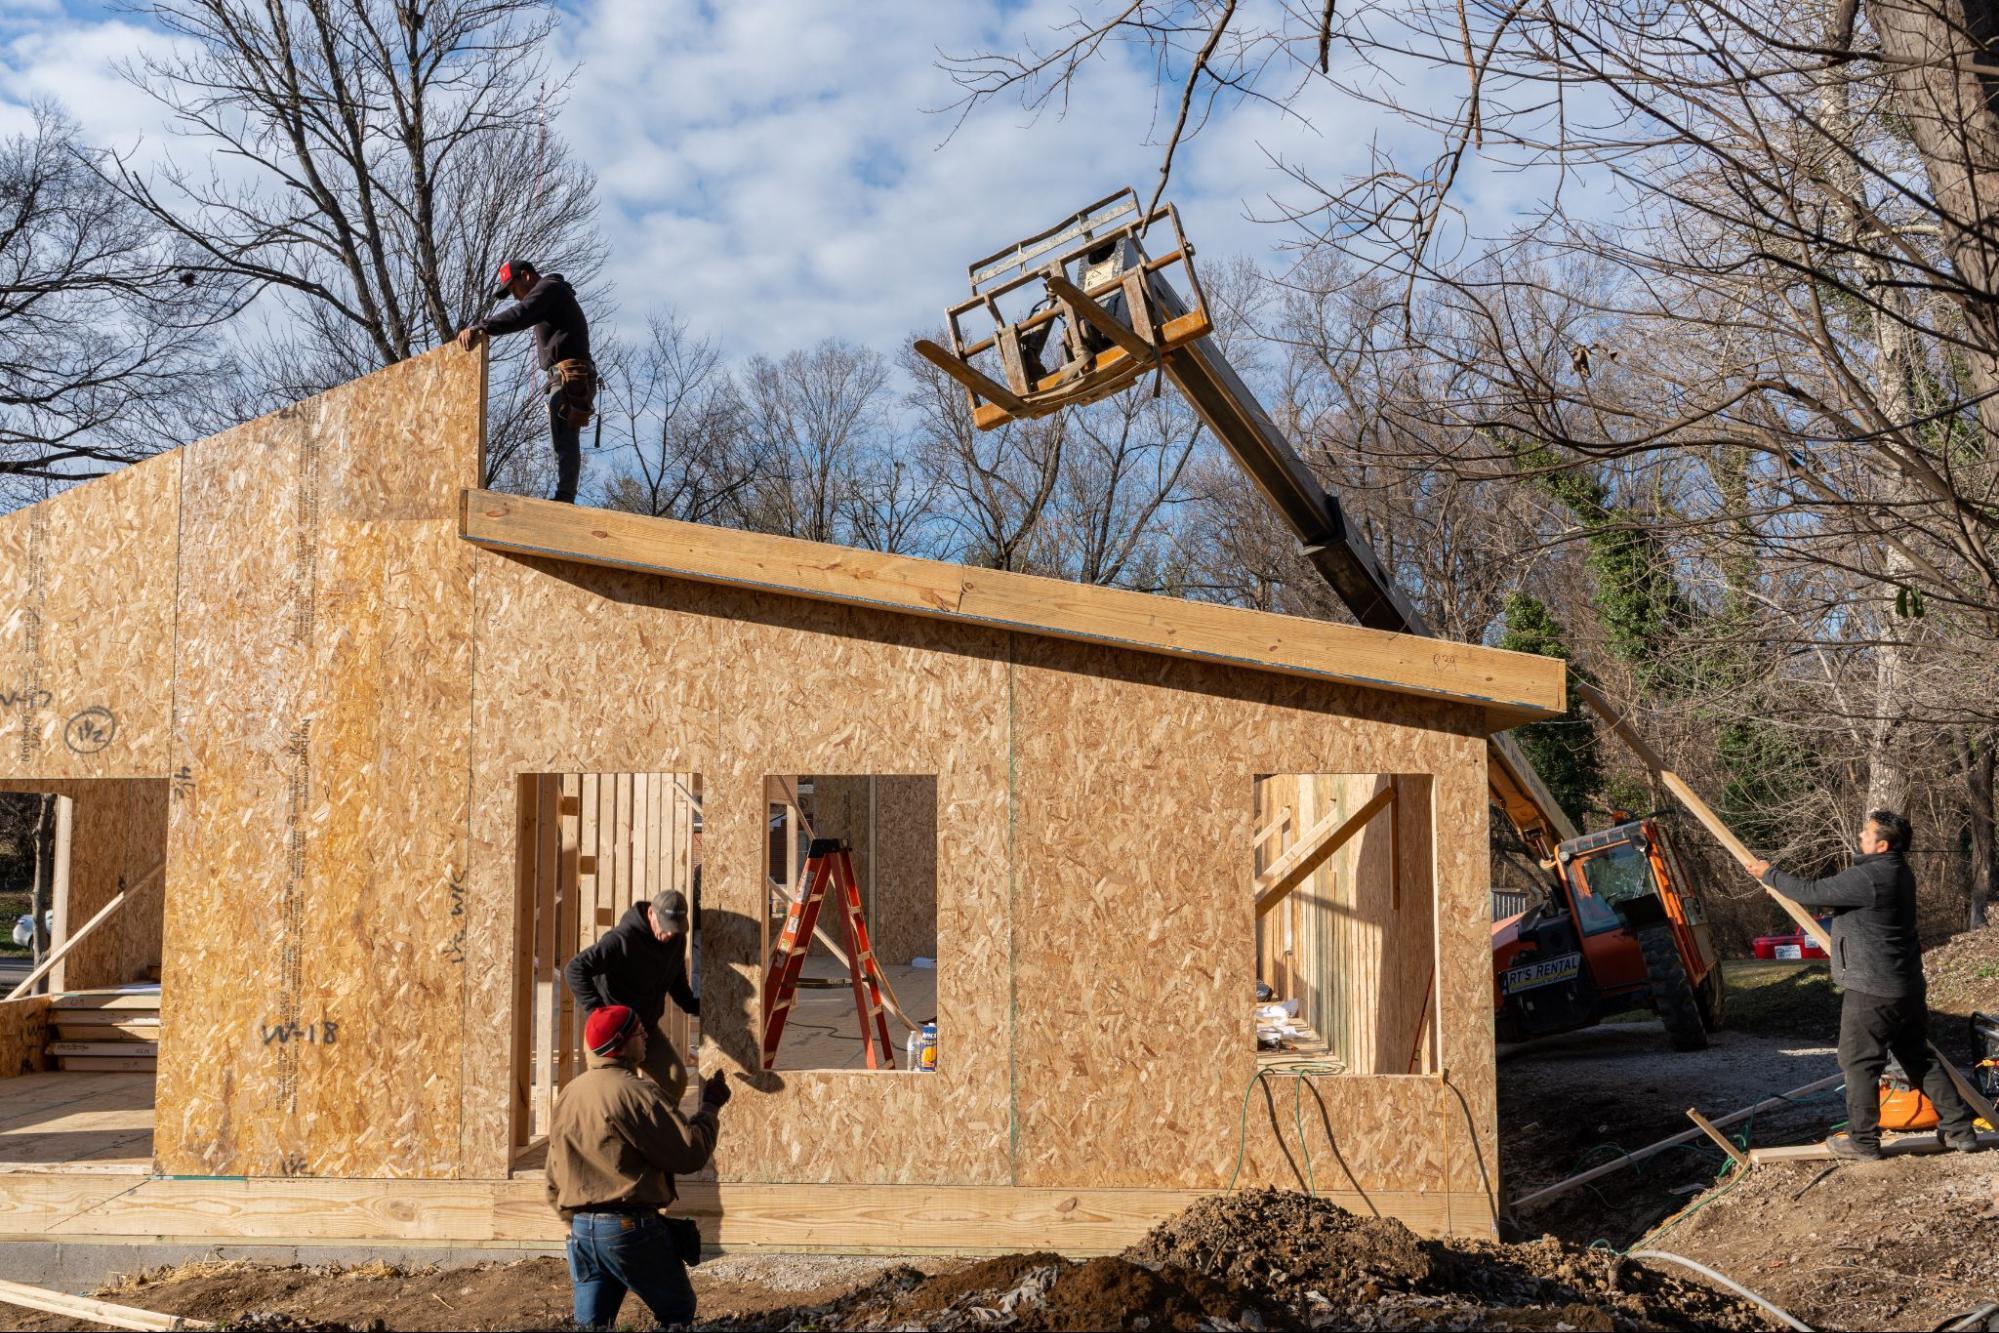
You will likely need a crane or forklift, such as a Skytrak, to lift your roof panels into place.
Refer to your plans to determine which roof panel to start with. If your design includes a ridge beam, avoid installing all panels on one side before moving to the other, as this can shift the ridge beam. Instead, alternately place panels on either side of the ridge beam to maintain balance and stability.
After deciding the starting point, take the first panel and attach stop plates to its bottom edge. These plates, secured to the inside skin with screws or nails, will prevent the panel from sliding down the slope during installation. Position the stop plates slightly above the bottom edge for the necessary overhang
The stop plates, while not necessary, should be placed the same distance from the bottom on each panel unless the overhang changes.

While still on the ground, attach the provided lift plates to the panel with the 2” SIP screws (provided). Try to keep it centered and use at least 10 screws on each plate.
For cottage plans, you should place one stop plate closer to the top and another further down to accommodate the roof slope. This adjustment is less critical for Ranch or Modern plans.
Before raising the panel, measure from the end to the center of the wall. This is where your SIP roof screws will be placed at 12" on center.
Using a power drill, start the screws into the outside skin of all four corners of the panel. For now, place each corner 12” in from the edge. It will be easier to connect panels if the edges are tight enough.
Once the set screws are in place, caulk along the panel joint between the first and second panels.
You are now ready to set up the first roof panel. Lift the panel into the air with your equipment; be sure no one is standing under it in case it falls.

Move the panel into position, aligning it with the gable end, end wall, and ridge beam, all of which should be caulked. Ensure that the top and bottom of the panel are equidistant along the gable end overhang, as well as along the eave overhang.

Once the panel is square with the house and ridge beam, begin securing it with screws. Start at one corner but don't fully tighten the screw, as you may need to make slight adjustments before inserting the next screw.
Step 8: Set Remaining Roof Panels
After both starter panels are set, you can start connecting roof panels.
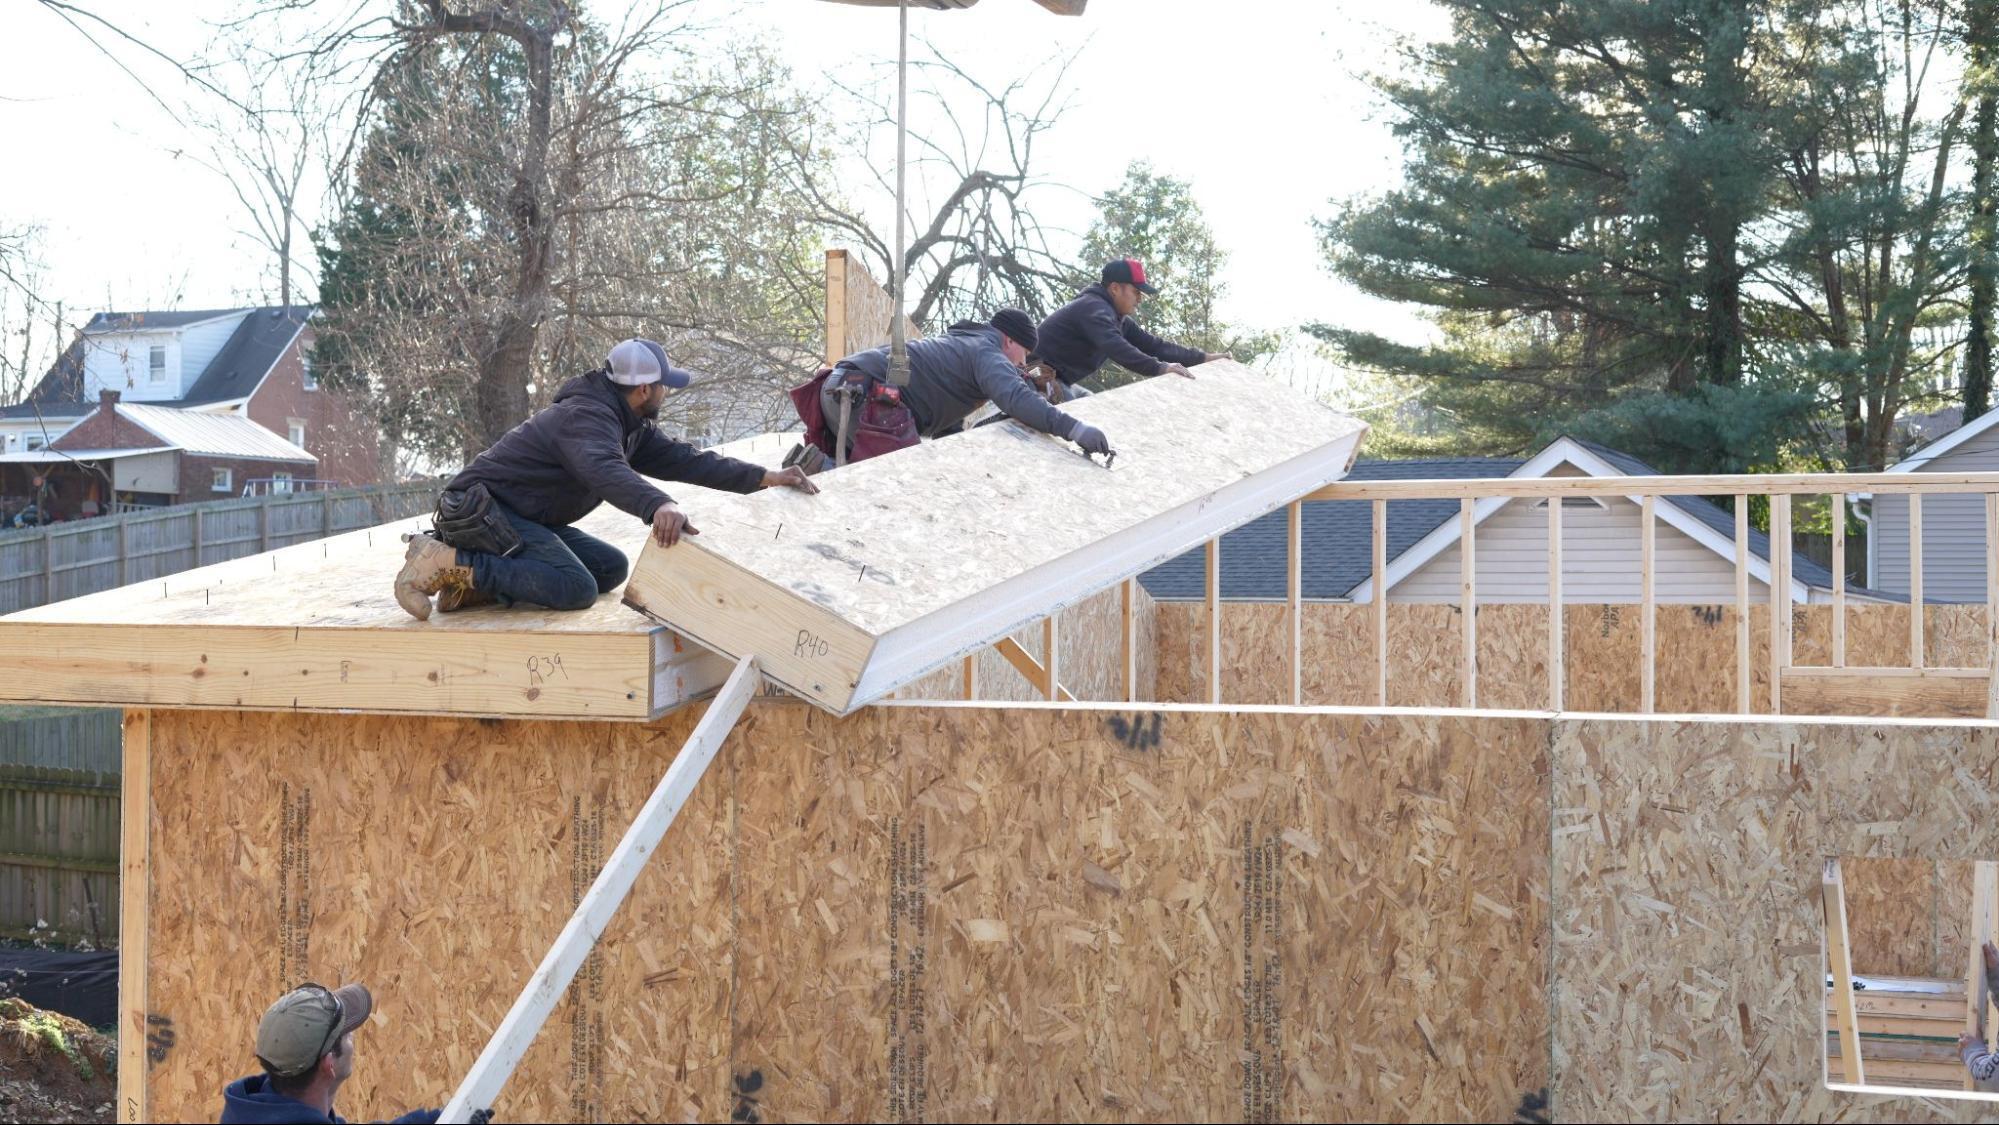
Roof panels function similarly to wall panels. One panel will have a piece of lumber protruding from one joint, which fits into the groove of the adjacent panel. Locate the next roof panel and apply a bead of caulk along the adjoining joint. Follow the same steps used for the starter panels. To join the panels, either push them together or use a sledgehammer or ratchet straps to pull them close. You may need to bounce on the panel to get it started, as vibrations will help the panels slide into place.
Use 8d nails spaced 6 inches apart on each side along the panel joints to reinforce the connection. Typically, you'll start by tacking the roof with a few nails, then return to fully nail all the joints once the roof installation is complete.
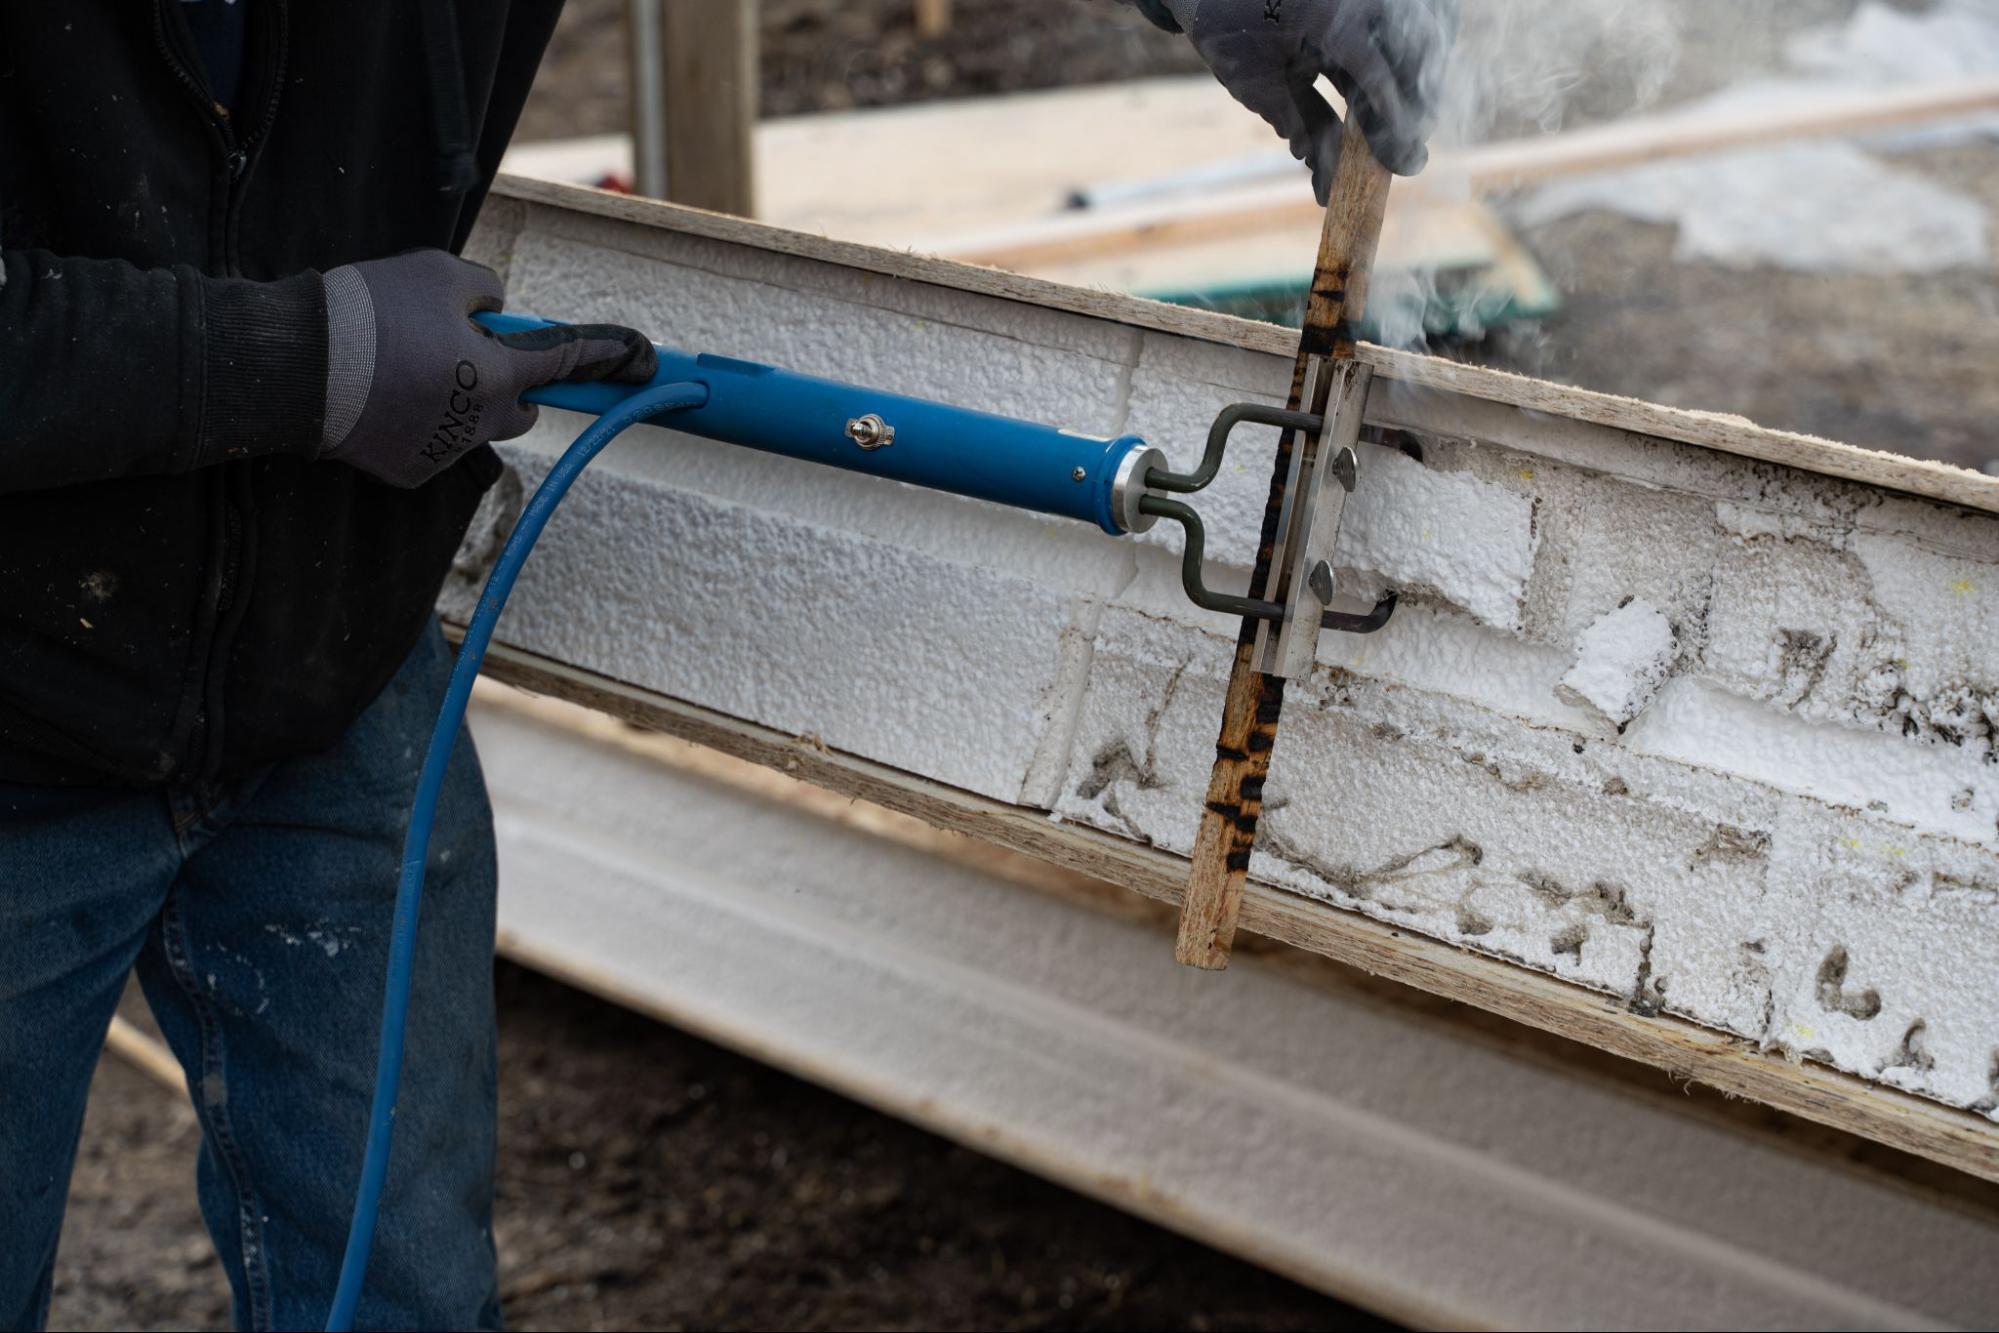
Proceed to the next panel, continuing until all roof panels are installed. You may need to trim the final panels to ensure a consistent overhang from top to bottom. If a panel is slightly out of square, it can affect the overhang. To correct this, remove the lumber from the end of the final panel, trim it as needed, and use the hot foam scoop to create a 1½” recess. Then, replace the 2x lumber. Your panel will now be ready for installation.
Step 9: Check Screws and Nails
Now, review all your joints, corners, and plates to ensure you’ve followed the nailing pattern for each panel. It's easy to miss or overlook a panel during the process, so a thorough check is important.
Step 10: Seal - Caulk, Tape, Wrap, Roof
Once you are confident everything is nailed properly:
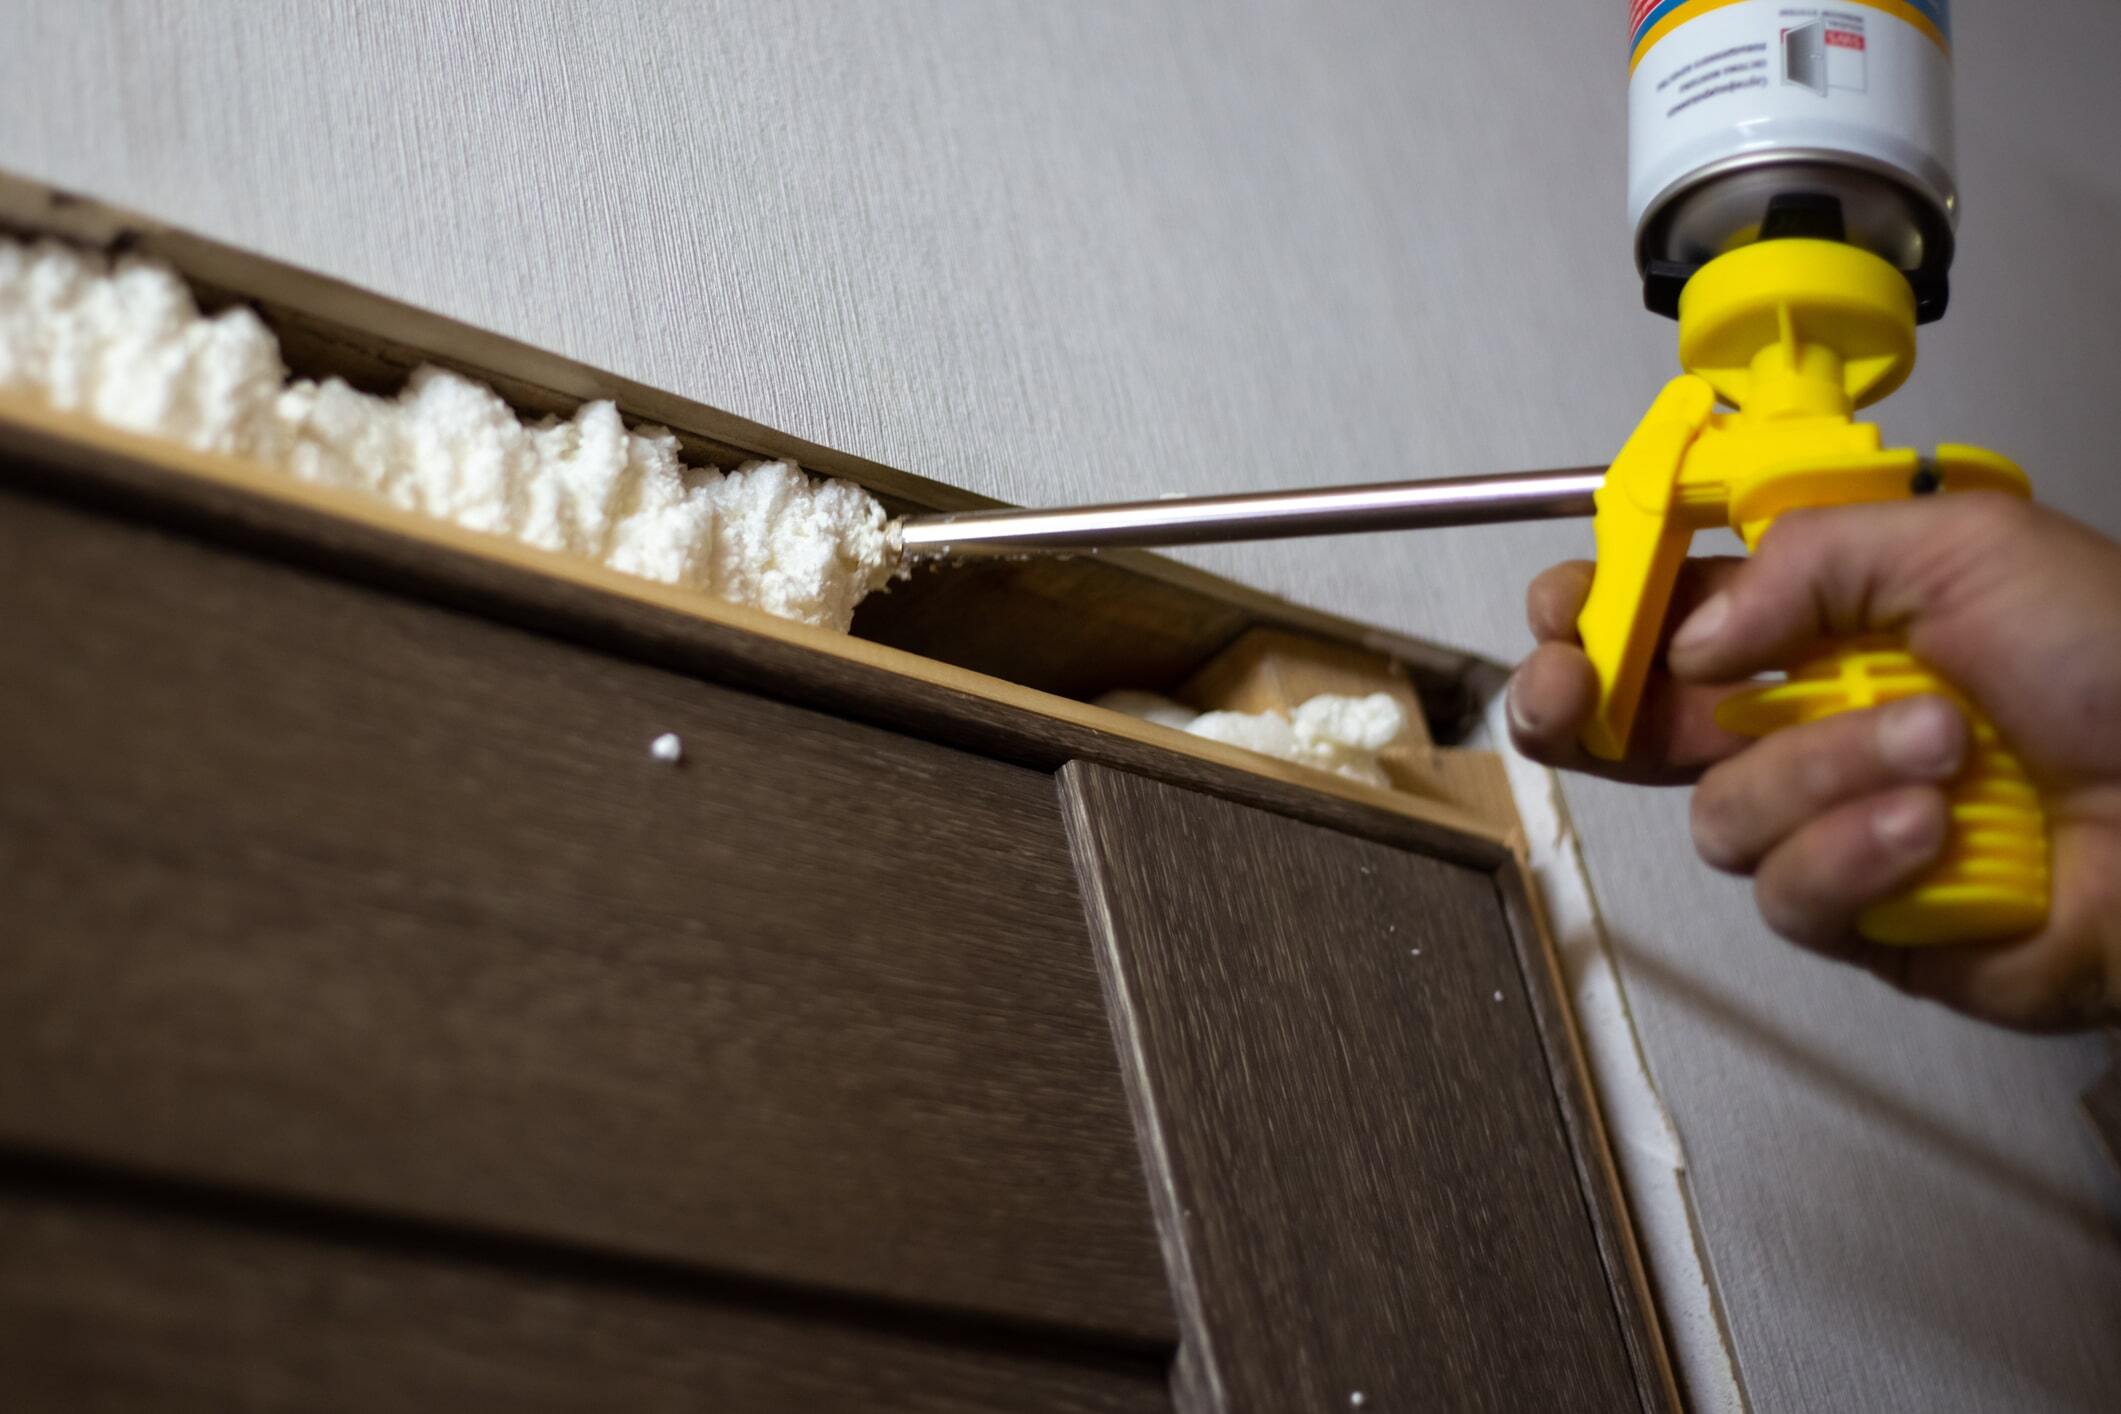
Once you are confident that everything is properly nailed, use expanding foam sealant to fill gaps or voids where light might show through from the inside to the outside. For tighter joints, you can also use caulk to ensure a complete seal.
On the interior surfaces of the roof, apply SIP tape along the joint from the top of the panel to the bottom. Be cautious, as the tape is very sticky and challenging to handle. Start at the top and work your way down slowly to ensure a smooth application.
Tape all of the connection joints and run a caulk bead along the joints between the roof and wall panels.
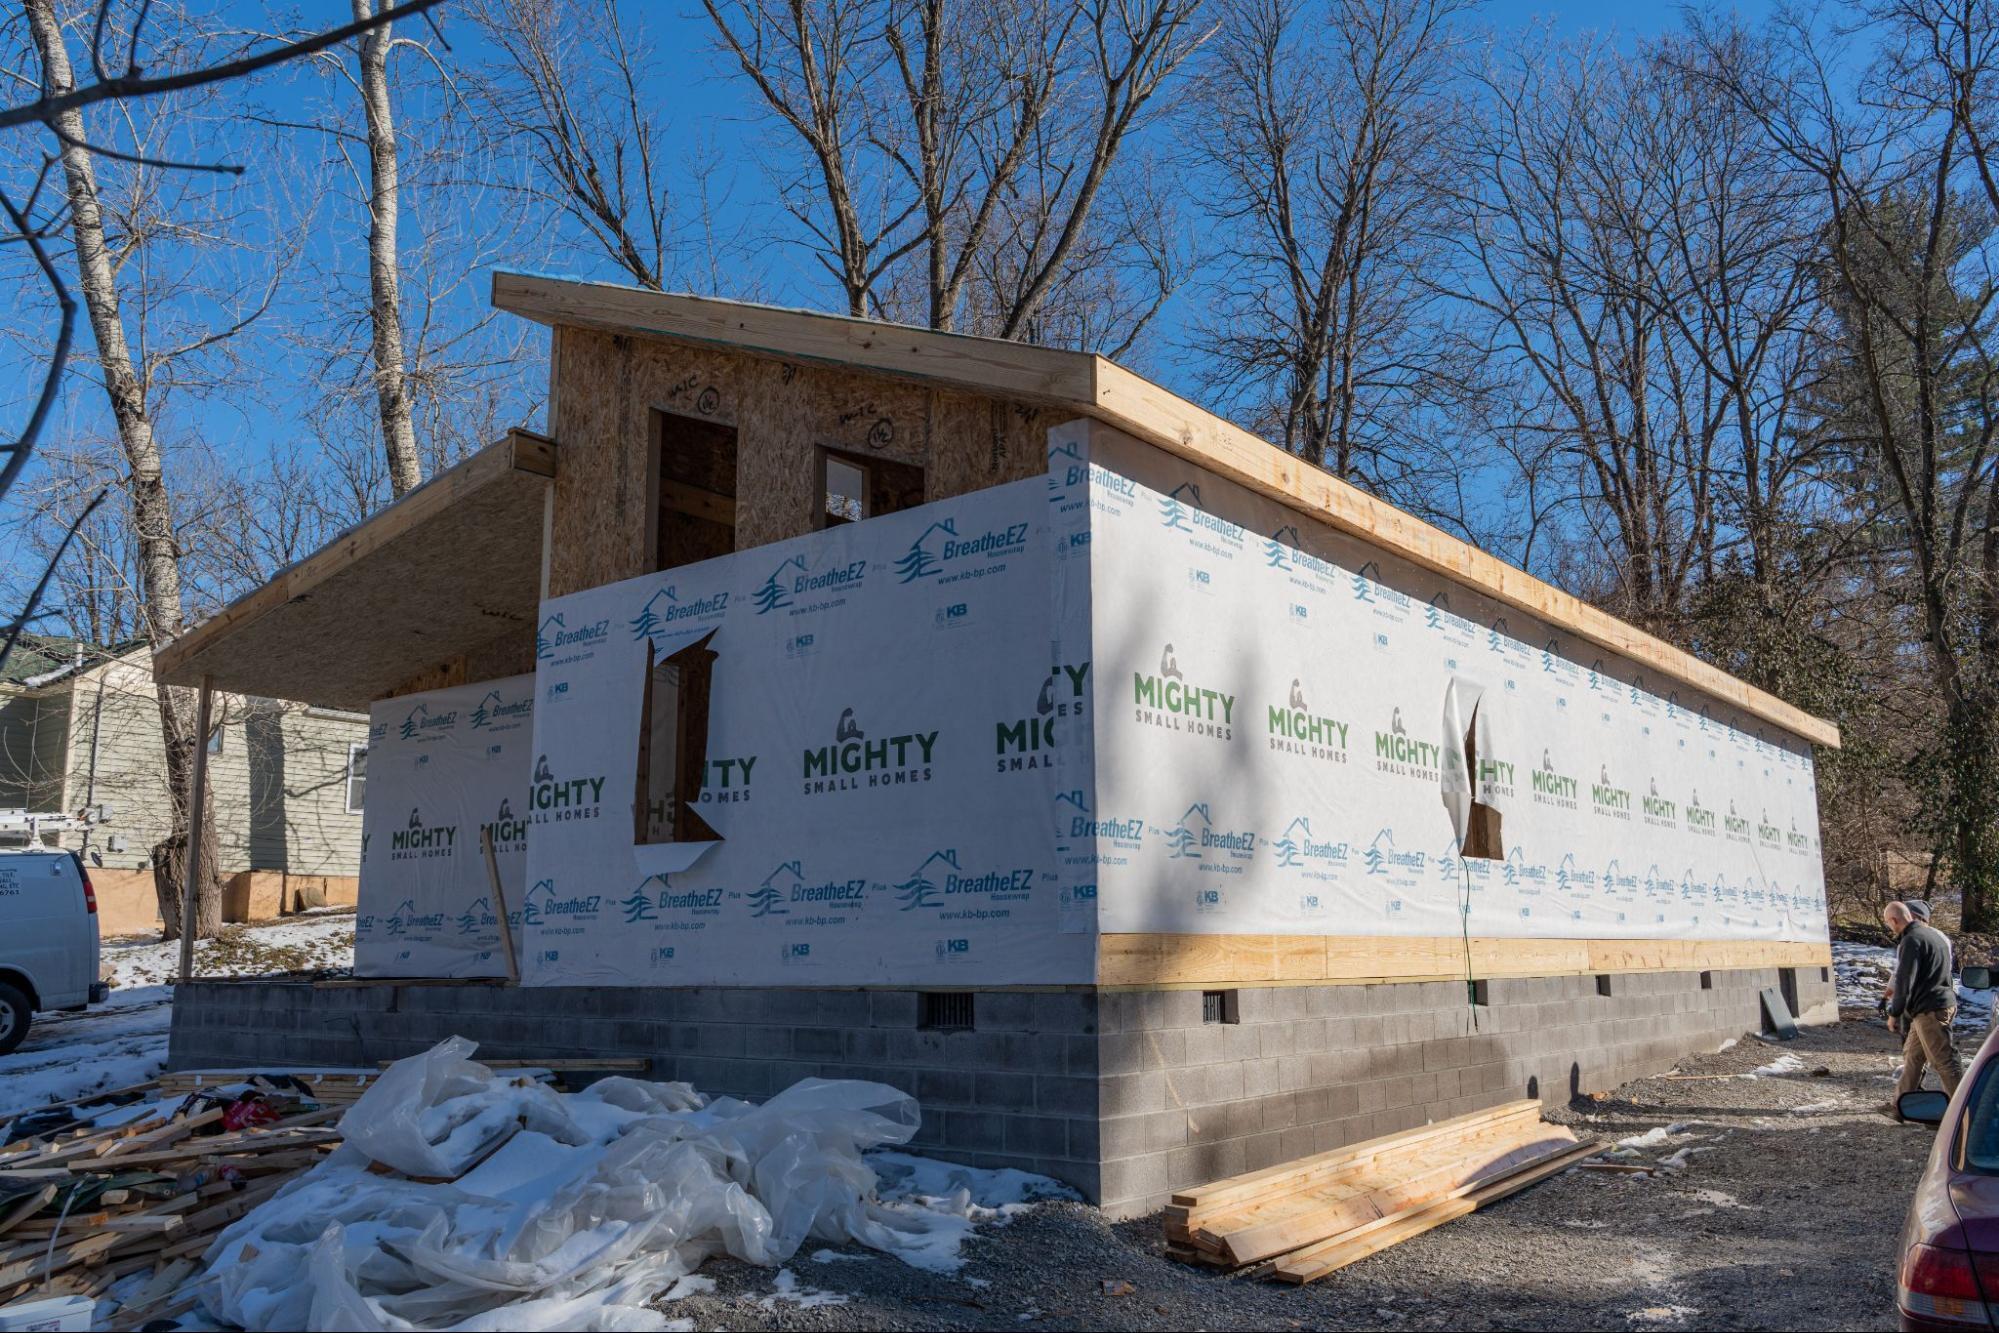
After you finish connecting wall and roof panels, you can install the house wrap and roofing underlayment.
We’re Ready to Help
If you want to know more on how to assemble your own prefab SIP home kit, you have questions about building your own SIP home, or you would like to discuss purchasing one of our prefab kits with a custom floor plan, please contact our team and we will be happy to get you started.
FAQs
Glue and bolt the treated plate to the foundation, or use nails with the proper tools. Ensure that anchor bolts come up through the plate and are secured with washers.
Position the panels with wiring chases closer to the bottom plate. Ensure they are plumb, square, and flush with the floor. Use caulk on the bottom plate or under the panel, and adjust the panel with a sledgehammer or mallet if necessary.
Essential tools include a power drill, sledgehammer or mallet, caulk gun, level, tape measure, and a crane or forklift for lifting panels. You may also need a hot foam scoop for trimming panels and a planer for leveling edges.
Use a level to check that each panel is vertical (plumb) and that the corners form right angles (square). Adjust the panels as needed before securing them with screws or nails.
Ensure all joints and seams are properly sealed with caulk and expanding foam sealant. Apply SIP tape along the interior joints to enhance the air barrier and insulation performance.
Use a high-quality, flexible exterior caulk or expanding foam sealant specifically designed for construction and building applications. This will help ensure a durable and weather-resistant seal.
Store SIP panels on a flat, level surface, and protect them from weather conditions. Avoid stacking panels too high to prevent bending or damage. Ensure they are covered and kept dry until installation.
Laminated Veneer Lumber (LVL) is an engineered wood product made by bonding together multiple thin layers of wood veneer with adhesives. The layers are aligned with the length of the finished lumber, providing enhanced strength and stability for structural applications.
Use the provided LVL to set the ridge beam into the pre-cut beam pocket. Ensure that the beam is properly aligned with the pocket and rests securely. Use a crane or lift for handling the beam because of its weight.